
When the folks at Murphy Door approached me to do a project with them, it didn’t take a lot of coaxing. I’ve been fascinated by secret doors and hidden compartments for as long as I can remember, and I had a project in mind.
Hidden doors today
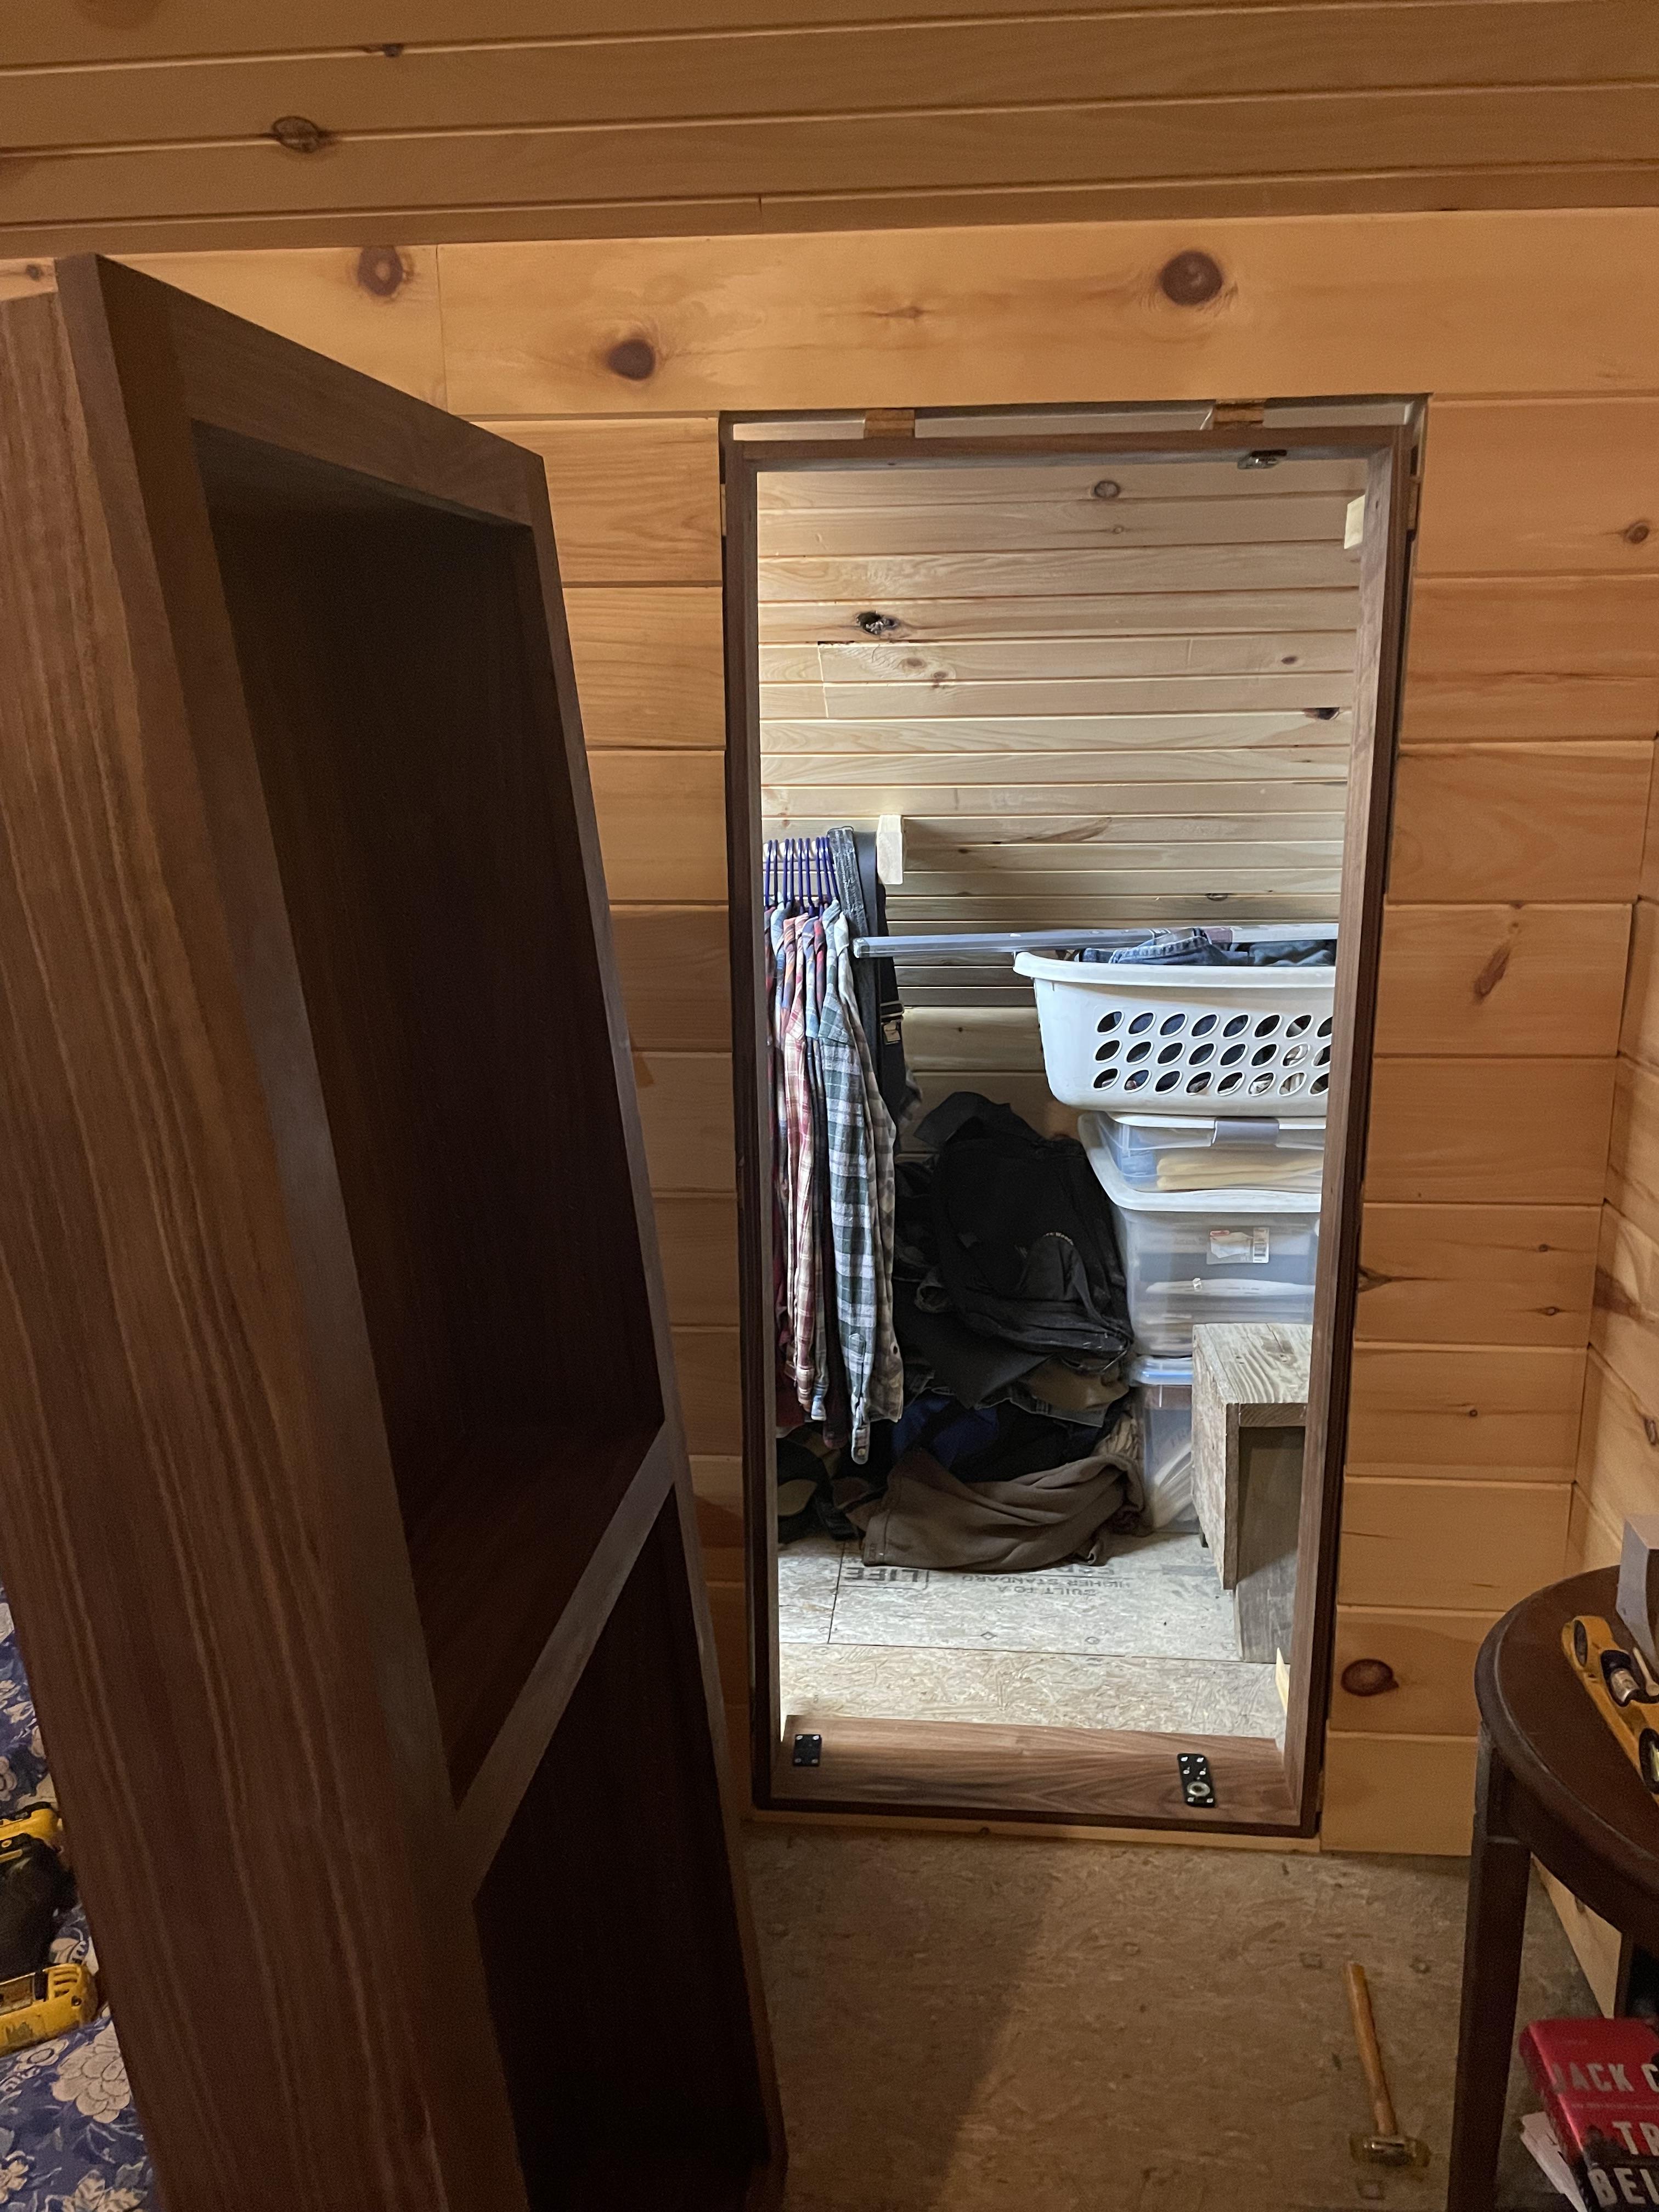
Hidden doors today mostly take the form of a bookcase or shelf unit that looks like it is built into the wall, but swings in or out to reveal a hidden area or passageway. It’s a great way to conceal a high-value storage area.
One of the most popular new uses for a hidden door is to conceal access to a room-size pantry in a custom kitchen or a walk-in closet. I had in mind turning a dead space behind a shower and bathtub in my house into a broom closet, and why not conceal the door with a bookshelf? That’s when I learned my first lesson about these kinds of hidden doors.
Lesson one: The right space
Murphy Door has set up an easy-to-use online ordering system to size a custom door project. It didn’t take long to realize my broom closet door wasn’t going to work. The Murphy Door uses a bearing pivot hinge to carry the significant weight of the door, and there is an arrangement of trim pieces that help conceal the door. Both of these presented challenges for the broom closet.
The opening was too narrow to accommodate the pivot and give good access. Plus, the opening was too close to a wall and window to effectively use concealing trim. Luckily, the Murphy Door folks and I figured all this out before we actually ordered the door for a different location.
I had already framed in a low door opening into a knee wall under my sloping upstairs ceiling to use the space behind as a small walk-in closet. It looked perfect for the Murphy Door, and we filled out the online order form.

Lesson two: Shipping
Murphy Door’s system was very efficient with notices of order receipt, manufacturing, and shipping the door. The door is built and assembled in its jamb then carefully packed and strapped upright on a pallet for shipping by a semi-truck. For residential deliveries, trucks are equipped with a lift gate to deliver the door more easily.
To ensure safe delivery, the package has a tilt gauge on it. I’d never seen this before. It’s a little device filled with colored beads. If at any time, the package is tilted past a certain point, the beads flow into a receptacle to witness the fact and alert to potential damage.
My tilt gauge was fine, and we slid the door safely from the semi-truck to my pickup truck for the final trip up my 450-foot driveway. Inside the box was more packing. Styrofoam blocks isolated the door, jamb, and any moving parts to safely make the trip to my shop.
Lesson three: Finishing
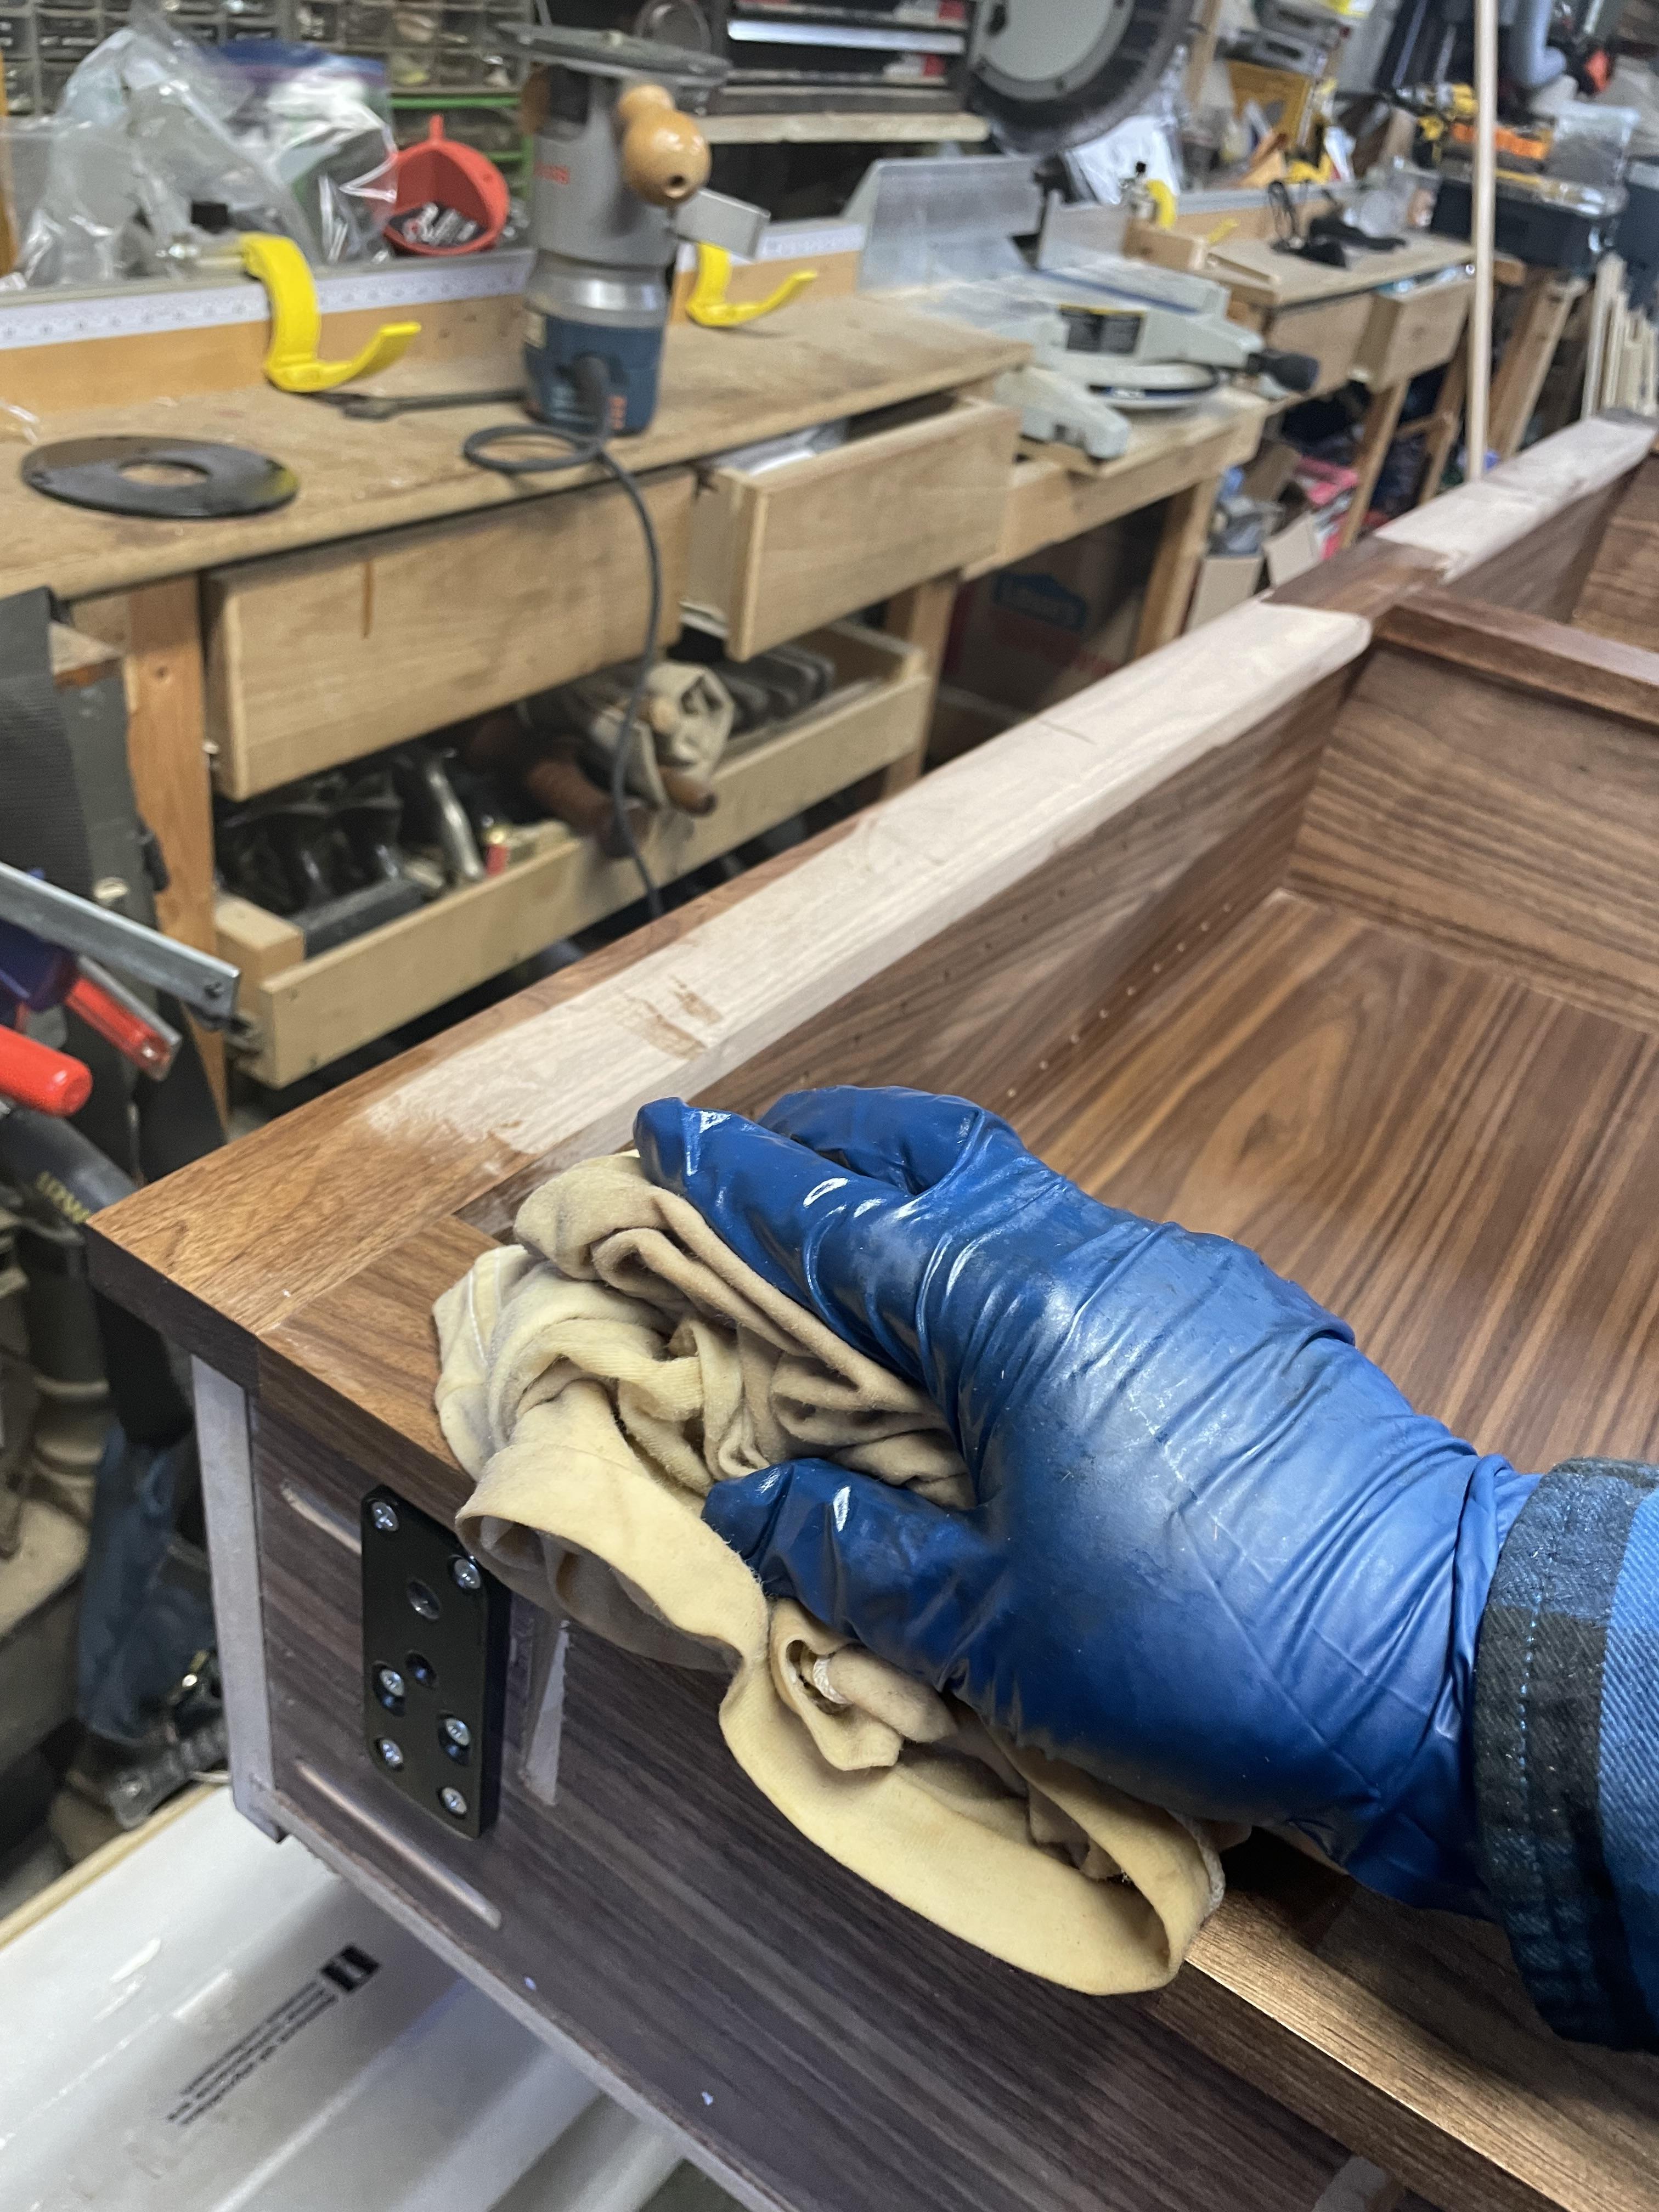
I ordered an unfinished door. Murphy Door does offer finished options, but unfinished let me match woodwork in the house. Murphy Door recommends professional finishing products for unfinished doors. I used common teak oil on the solid walnut and walnut veneer parts to achieve a rich, oiled luster with an easily repairable finish.

I disassembled the door from the jamb for finishing following instructions from Murphy Door. That also gave me my first chance to closely examine the robust pivot bearing and see how it works. You use a special tool (supplied in the kit) to retract the upper hinge pin from the jamb.
Lesson four: Installation
Installing the jamb was no more difficult than installing any pre-hung door. You use shims to set the jamb in place and make sure everything is level, plumb and flush with the finished wall opening. You drive screws through the jamb and shims to secure the jamb to the framing. One important consideration is to make sure the door will clear carpet or flooring when it swings.
To hang the door, you tilt it and insert the bottom pivot point into the lower bearing, then bring it to vertical. Next you press up the top pivot point until it fully engages the top bearing and locks into place. I did it as one person; it might have been even easier with help.

Lesson five: Installing trim
Once you check the swing of the door, it’s time for trim. This takes precision as it affects not just the final look of the door and its concealment, but also how the door operates. For an in-swing door, the trim is on the outside. For my outswing door, some of the trim rides on the door and some is fixed to the wall. Trim that rides on the door is glued and screwed into place.
Instructions from Murphy Door, including a digital phone app showing each step, were a big help and clearly guided each step of the process.

Lesson six: Final thoughts
I’m really pleased with the results. The door swings silently and easily even loaded with books. It snaps securely closed. The door does take up some of the opening space, so consider using a larger opening than you might normally plan.
During the project, I happened to talk to a cabinet shop owner who was telling me how popular these kinds of doors have become. Seems like a great high-profit, relatively low labor option as a value-added project. You can learn more at murphydoor.com.


Have something to say? Share your thoughts with us in the comments below.