It never ceases to amaze me how many people who make their living making things with wood don’t actually understand the basic properties of the material. Wood is constantly changing as its internal moisture content changes with changes in the atmosphere around it. Depending on the species, those changes can be dramatic — and catastrophic if you don’t pay attention.
Part of paying attention is understanding that the changes in wood are not just about changes in the atmosphere but also vary according to the grain direction. Wood generally expands more across its grain than it does along its grain. This is why we build five-piece solid wood doors with a floating panel in the center. The stiles (the vertical pieces in the door frame) go the full length top to bottom in the frame since they will change the least in their length. The rails (the horizontal parts of the frame) span the distance between the stiles. The panel is designed to have room to float in the frame because it will expand the most across its width.
Ignore at your risk
For many of you — most, I hope — this is all very basic, but you might be surprised how many don’t understand these principles or just ignore them. More than 30 years ago, when I was the newly hired editor of Fine Woodworking magazine, one of the first calls I got was from the owner of a company in Florida that made tables and shipped them all over the country. He was having repeated cases of his tabletops made with breadboard ends blowing up after they had been shipped to the customer. He wanted to know what kind of glue would hold them in place.
I told him no glue on Earth was going to stop the ends from fighting the likely dramatic growth and contraction across the grain of the boards in the body of the tabletop. The traditional solution is to mount the breadboard ends with a long groove enclosing the tongues on the tabletop boards. A center pin in each breadboard end anchors the end in place, but additional pins go through oval holes in the tabletop tongues to allow the top to expand and contract with the seasons. If done right, over different times of the year, the ends will be proud of the tabletop or the tabletop will be proud of the ends, but everything will stay together.
Instead of tenons or tongues on the ends of the tabletop boards, some clever makers use a long loose tenon or spline that rides in slots in both the tabletop and ends. The spline purposely sticks out proud of both. Then the movement of all three pieces is at play. The spline and end remain relatively constant to each other, but the tabletop still can move. Over the course of a year, you’ll be able to see and feel that change on the edge with your fingers, but it will seem less noticeable because the spline is always proud of both.
A wooden hygrometer
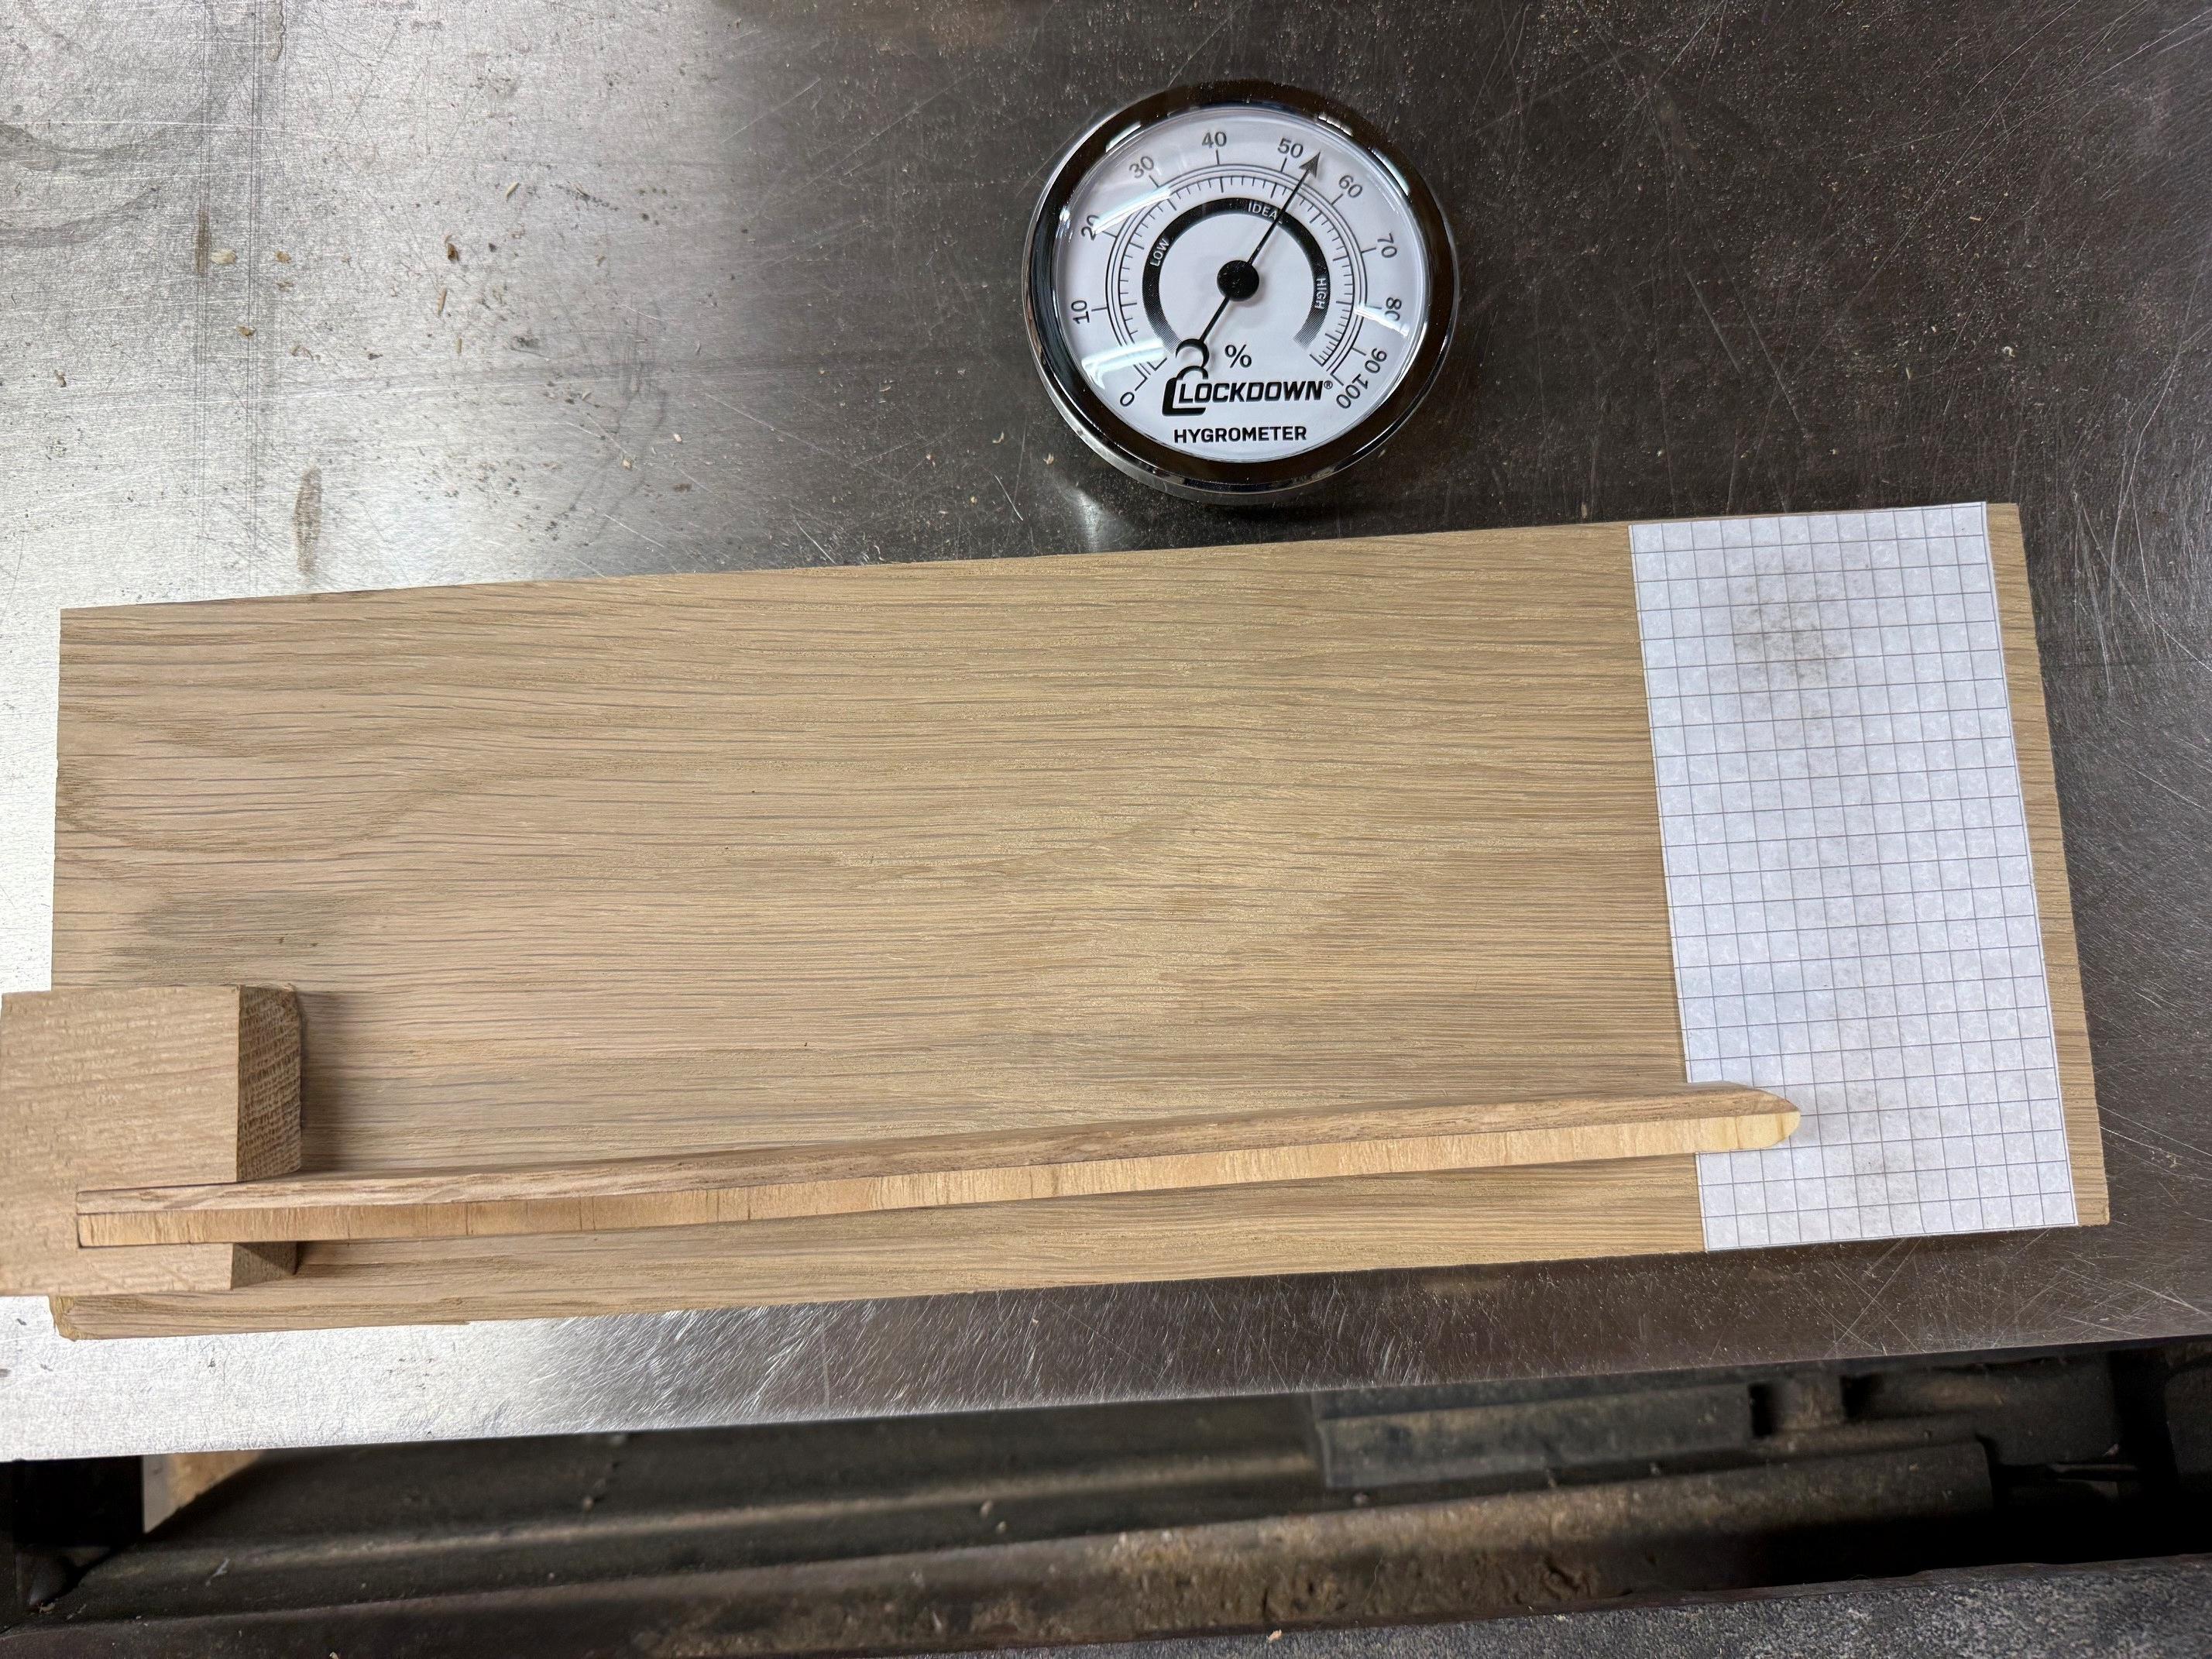
In essence, the tabletop becomes a hygrometer of sorts, dynamically showing the changes in moisture throughout the year. In a typical home, humidity increases in the summertime and decreases in the winter as indoor heating devices dry the air. A great exercise is to build your own simple hygrometer out of scrap wood to remind yourself of the dynamic changes in wood and use it to explain these principles to your customers and less well-informed woodworkers.

Dimensions are not critical, but I’ll share what I did to get you started. The key thing is to create an indicator bar that purposefully uses crossgrain construction to demonstrate wood dynamics in a measurable way.
I cut a 3/16-inch strip off the end of a 10-inch wide 3/4-inch thick board to give me a piece that would place the crossgrain of the board all along the strip’s length. Then I married that to another piece of the same dimensions, but with the long grain running along its length. The idea is that the crossgrain piece will want to expand and contract more and will be the “driver” of the device, while the long-grain piece holds it all together.
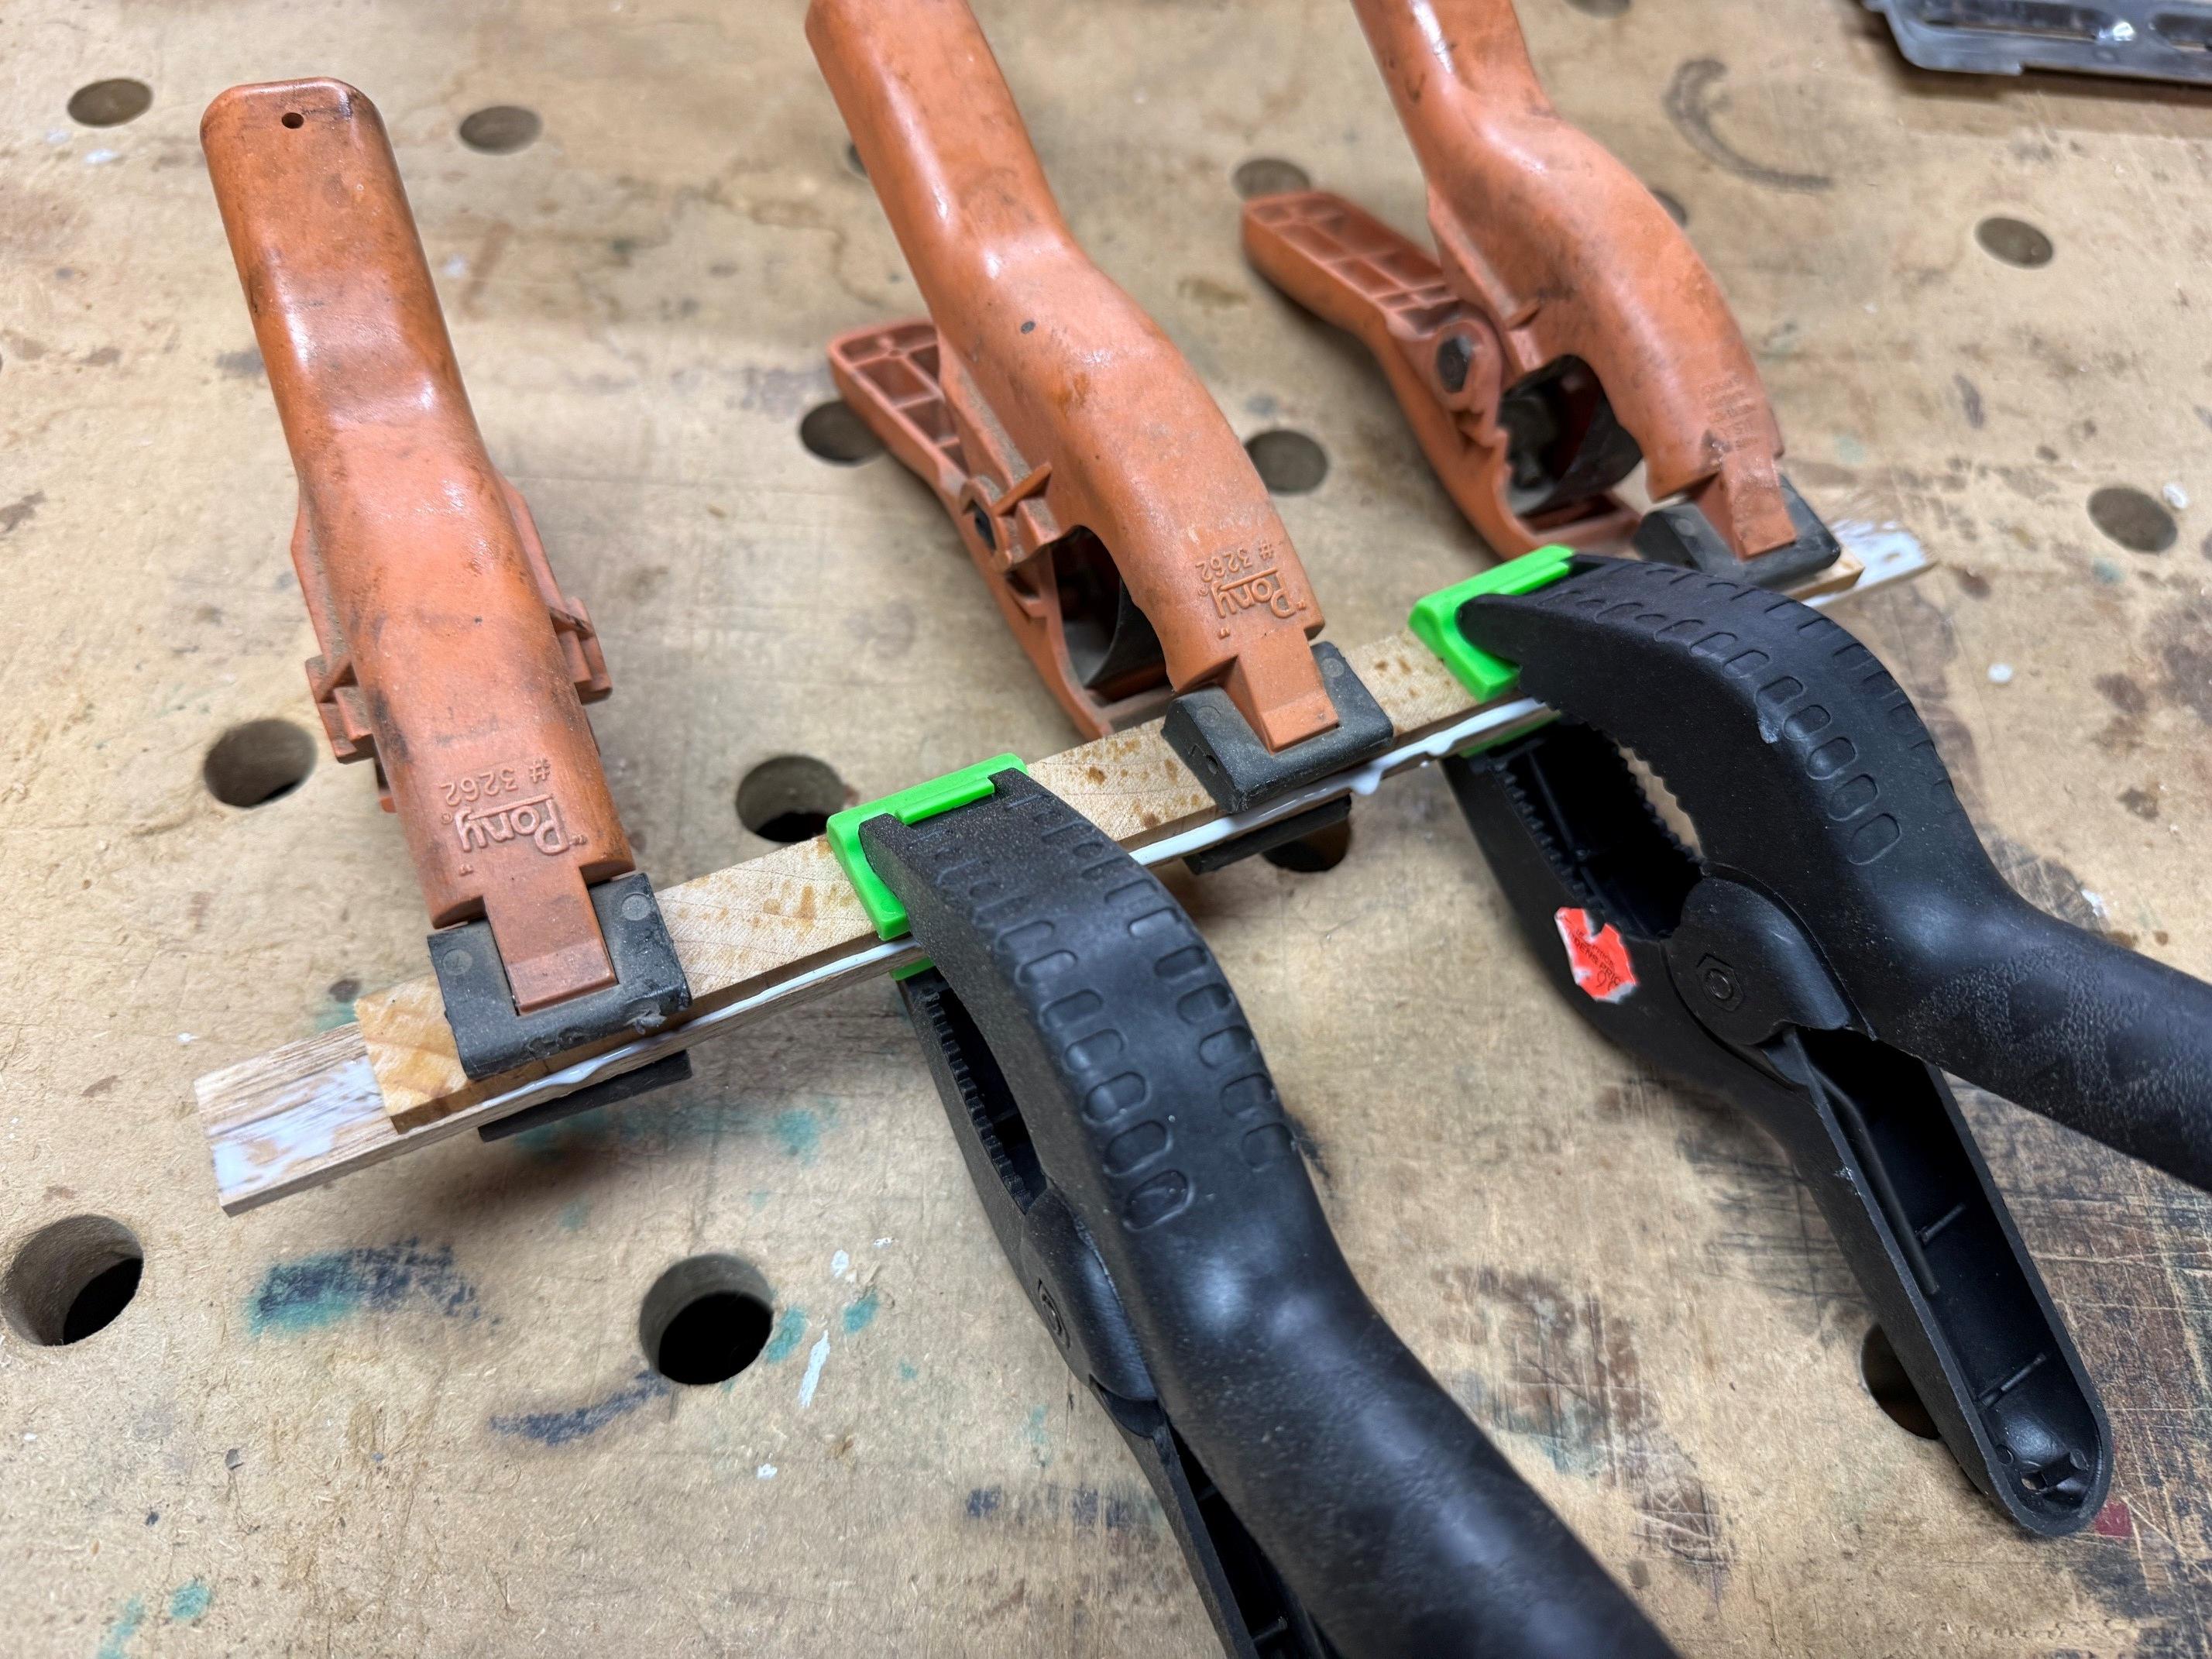
Putting it together
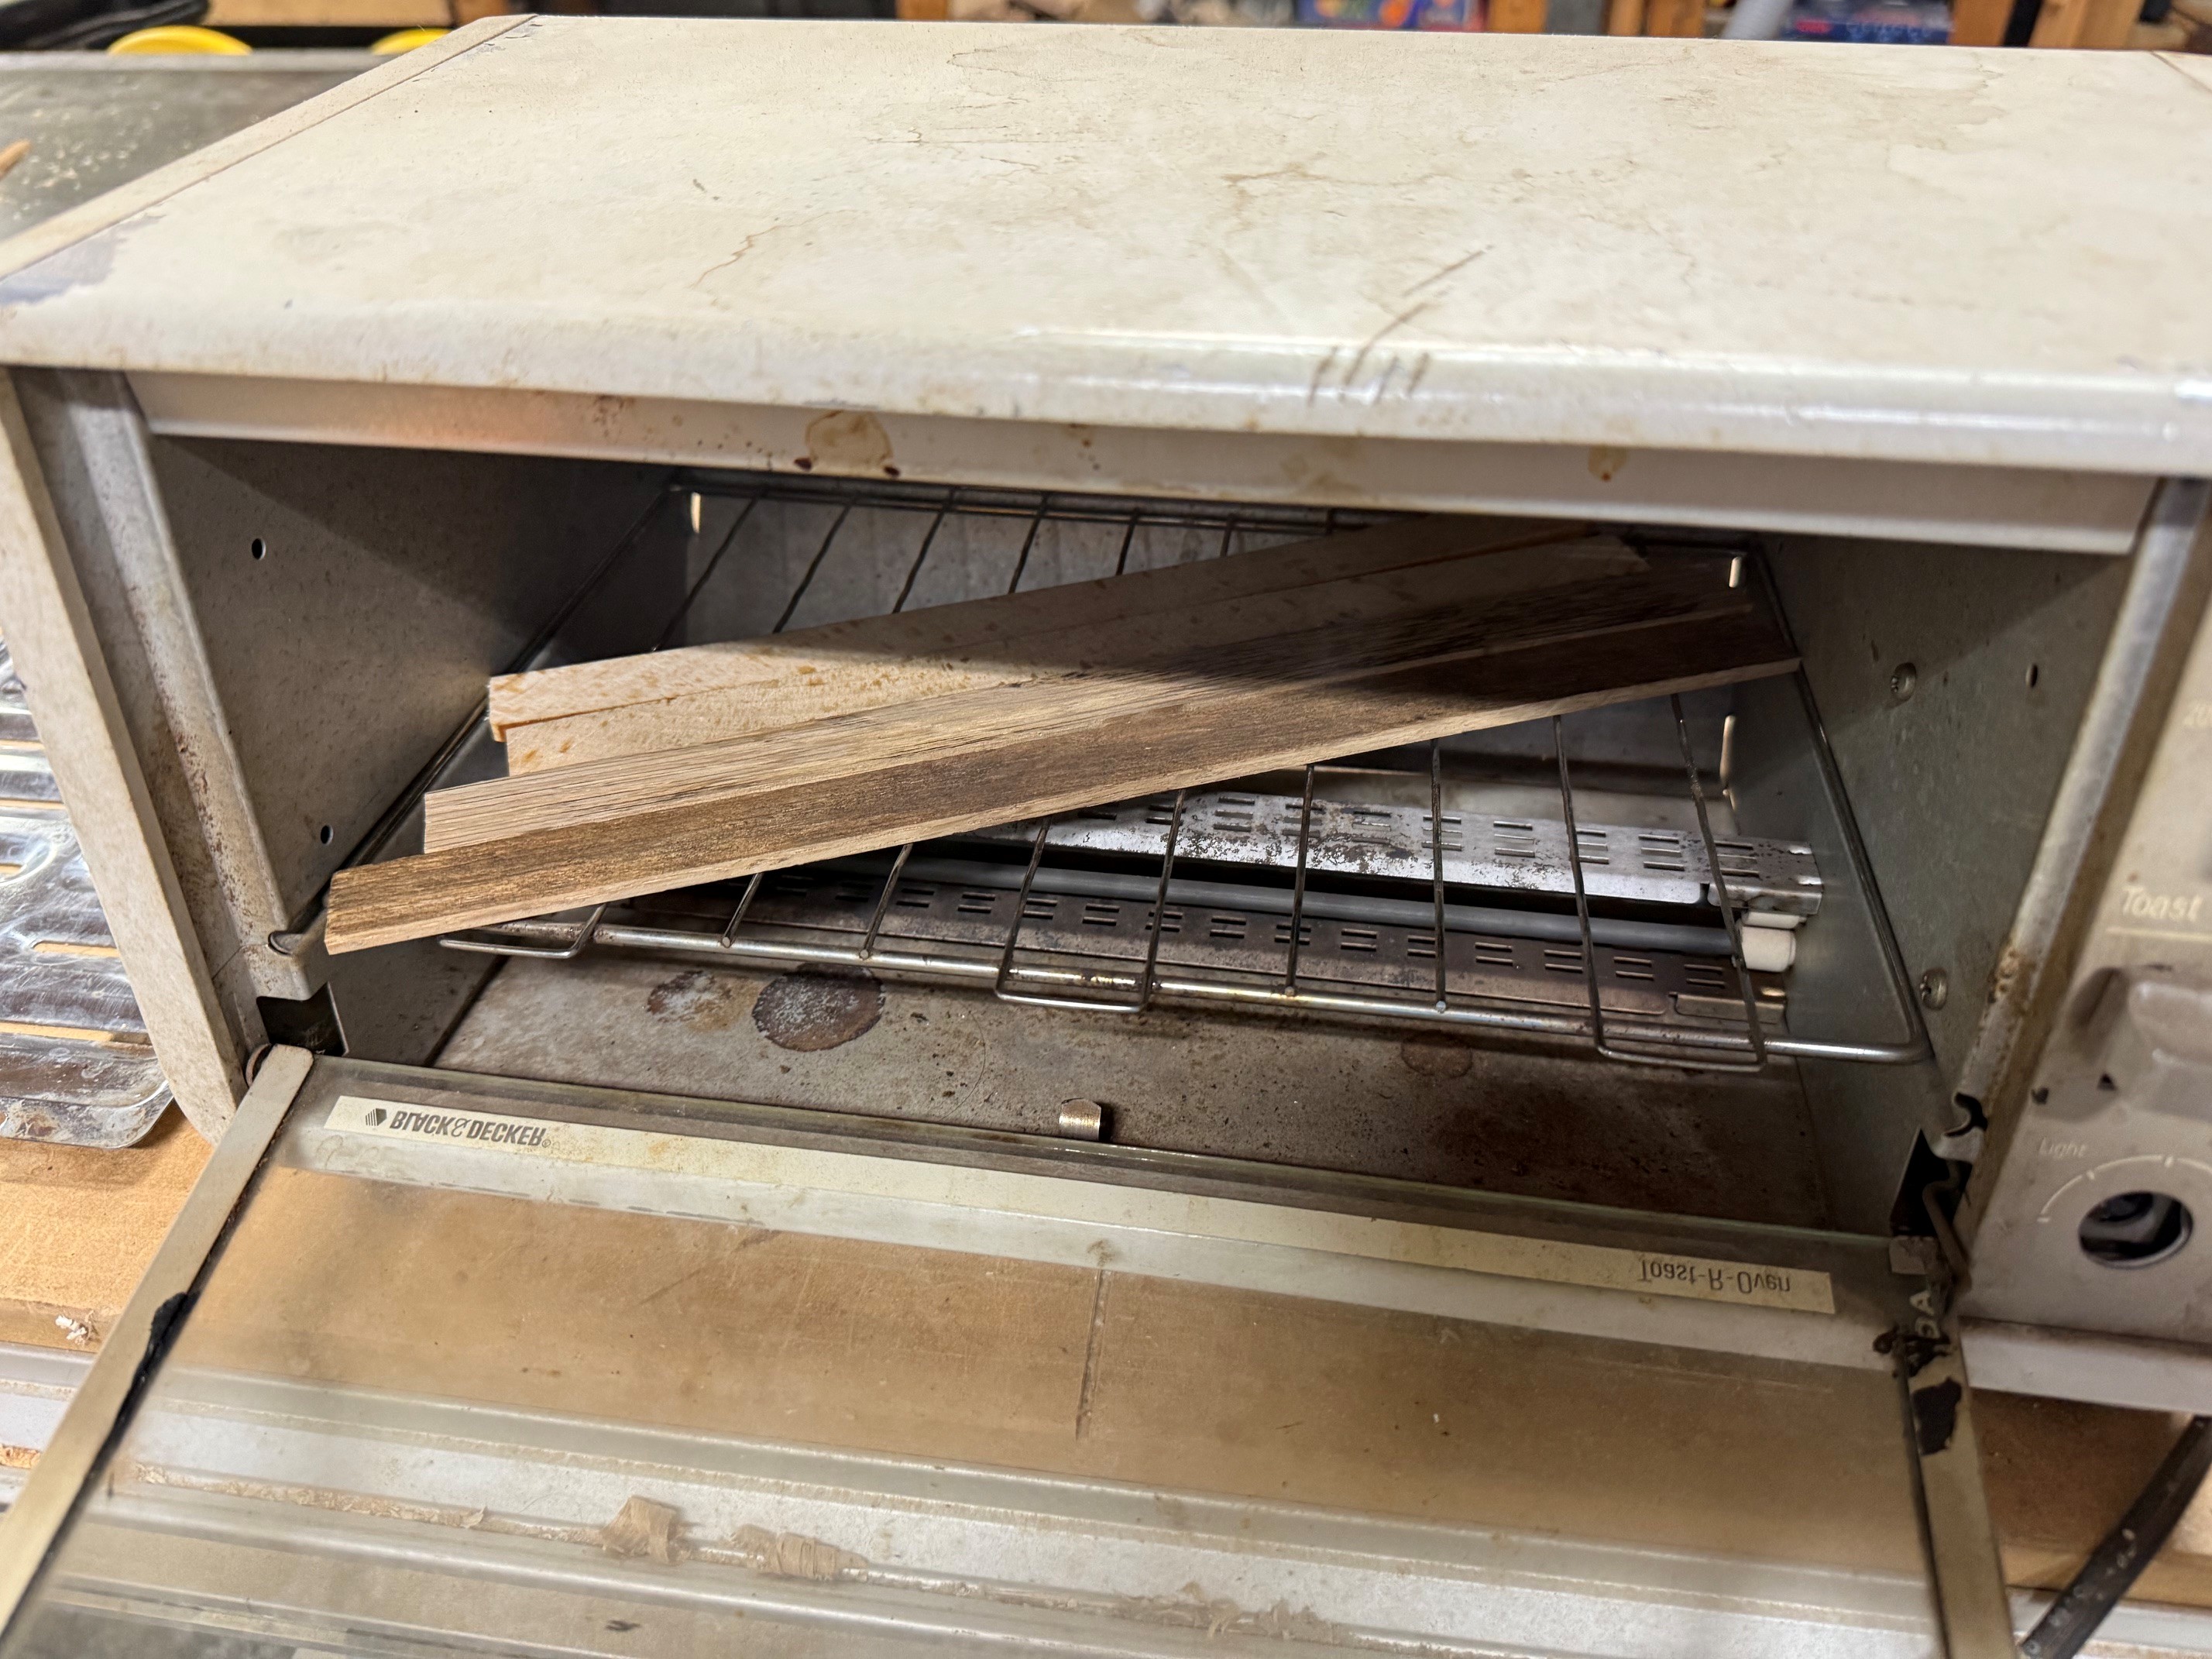
It’s important to make sure the wood is completely dry before gluing the pieces together. My moisture gauge goes down only to 6%, which is what these scraps registered, but I wanted them as dry as possible, so I put the pieces in a toaster oven, and oven-dried them until they weren’t losing any more weight.
Incidentally, it’s not terribly critical what species of wood you use, but some species that move a lot, like hickory, will show more movement in your hygrometer, than more stable species such as mahogany. I’ve used various species in the past to make these simple hygrometers, but this one uses pine in the crossgrain and oak in the long-grain pieces.
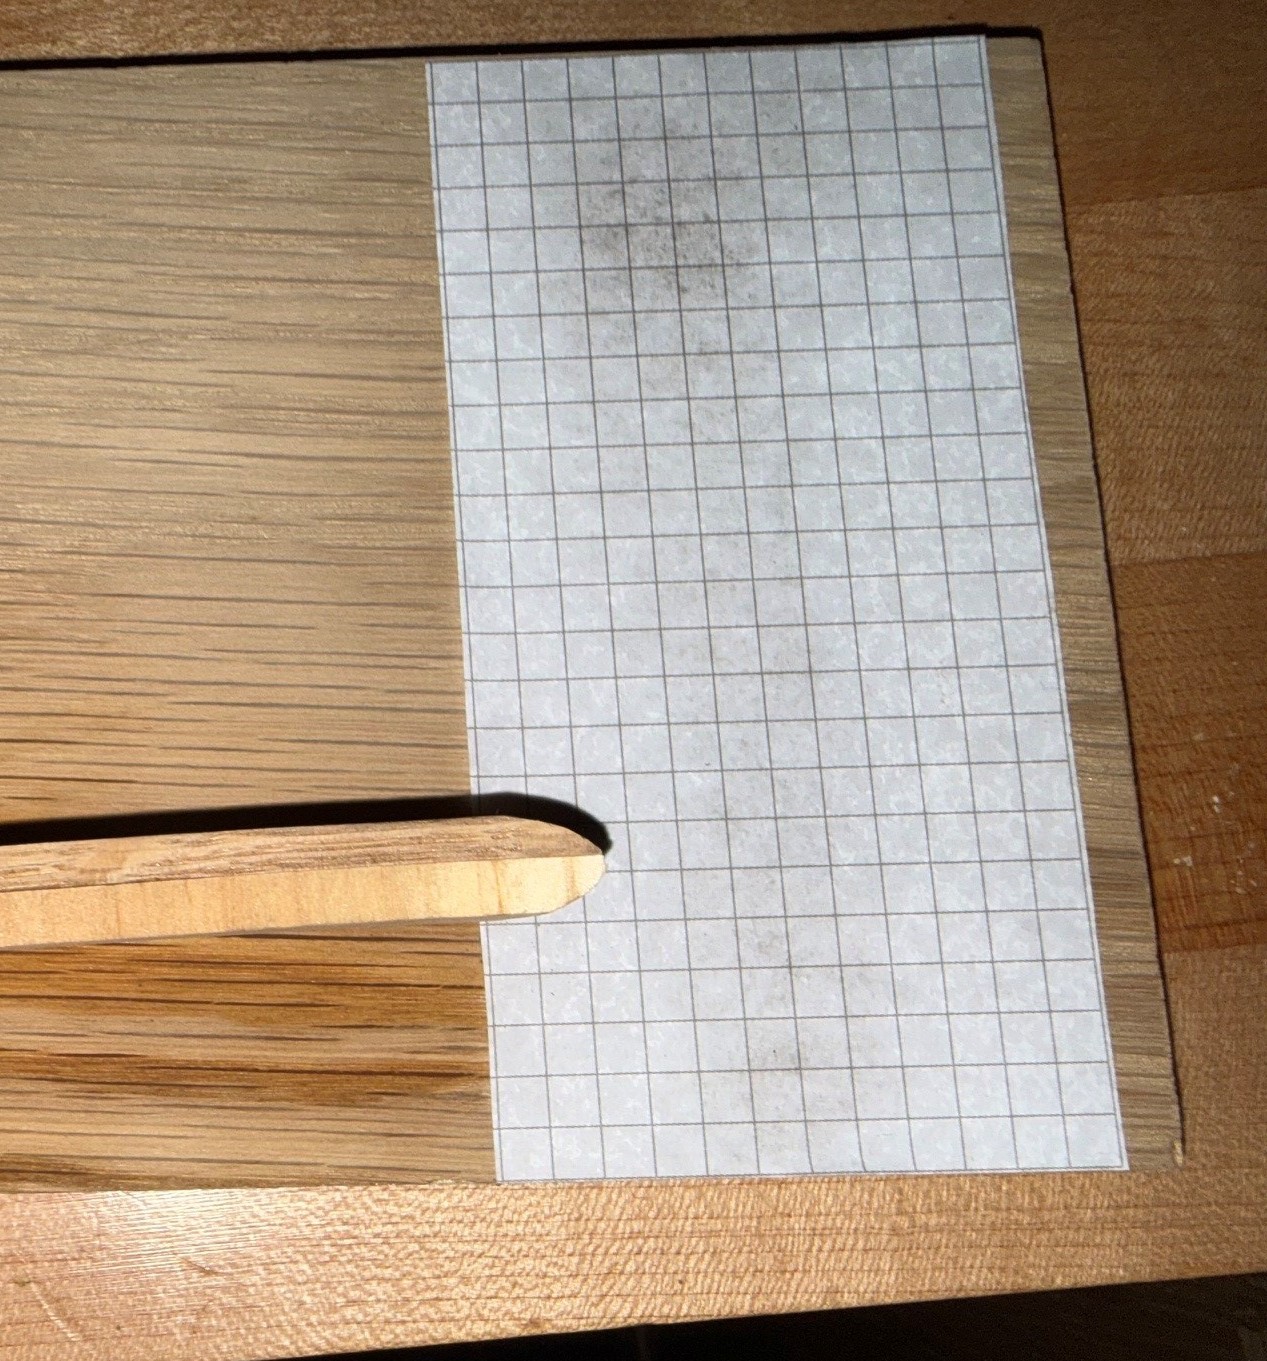
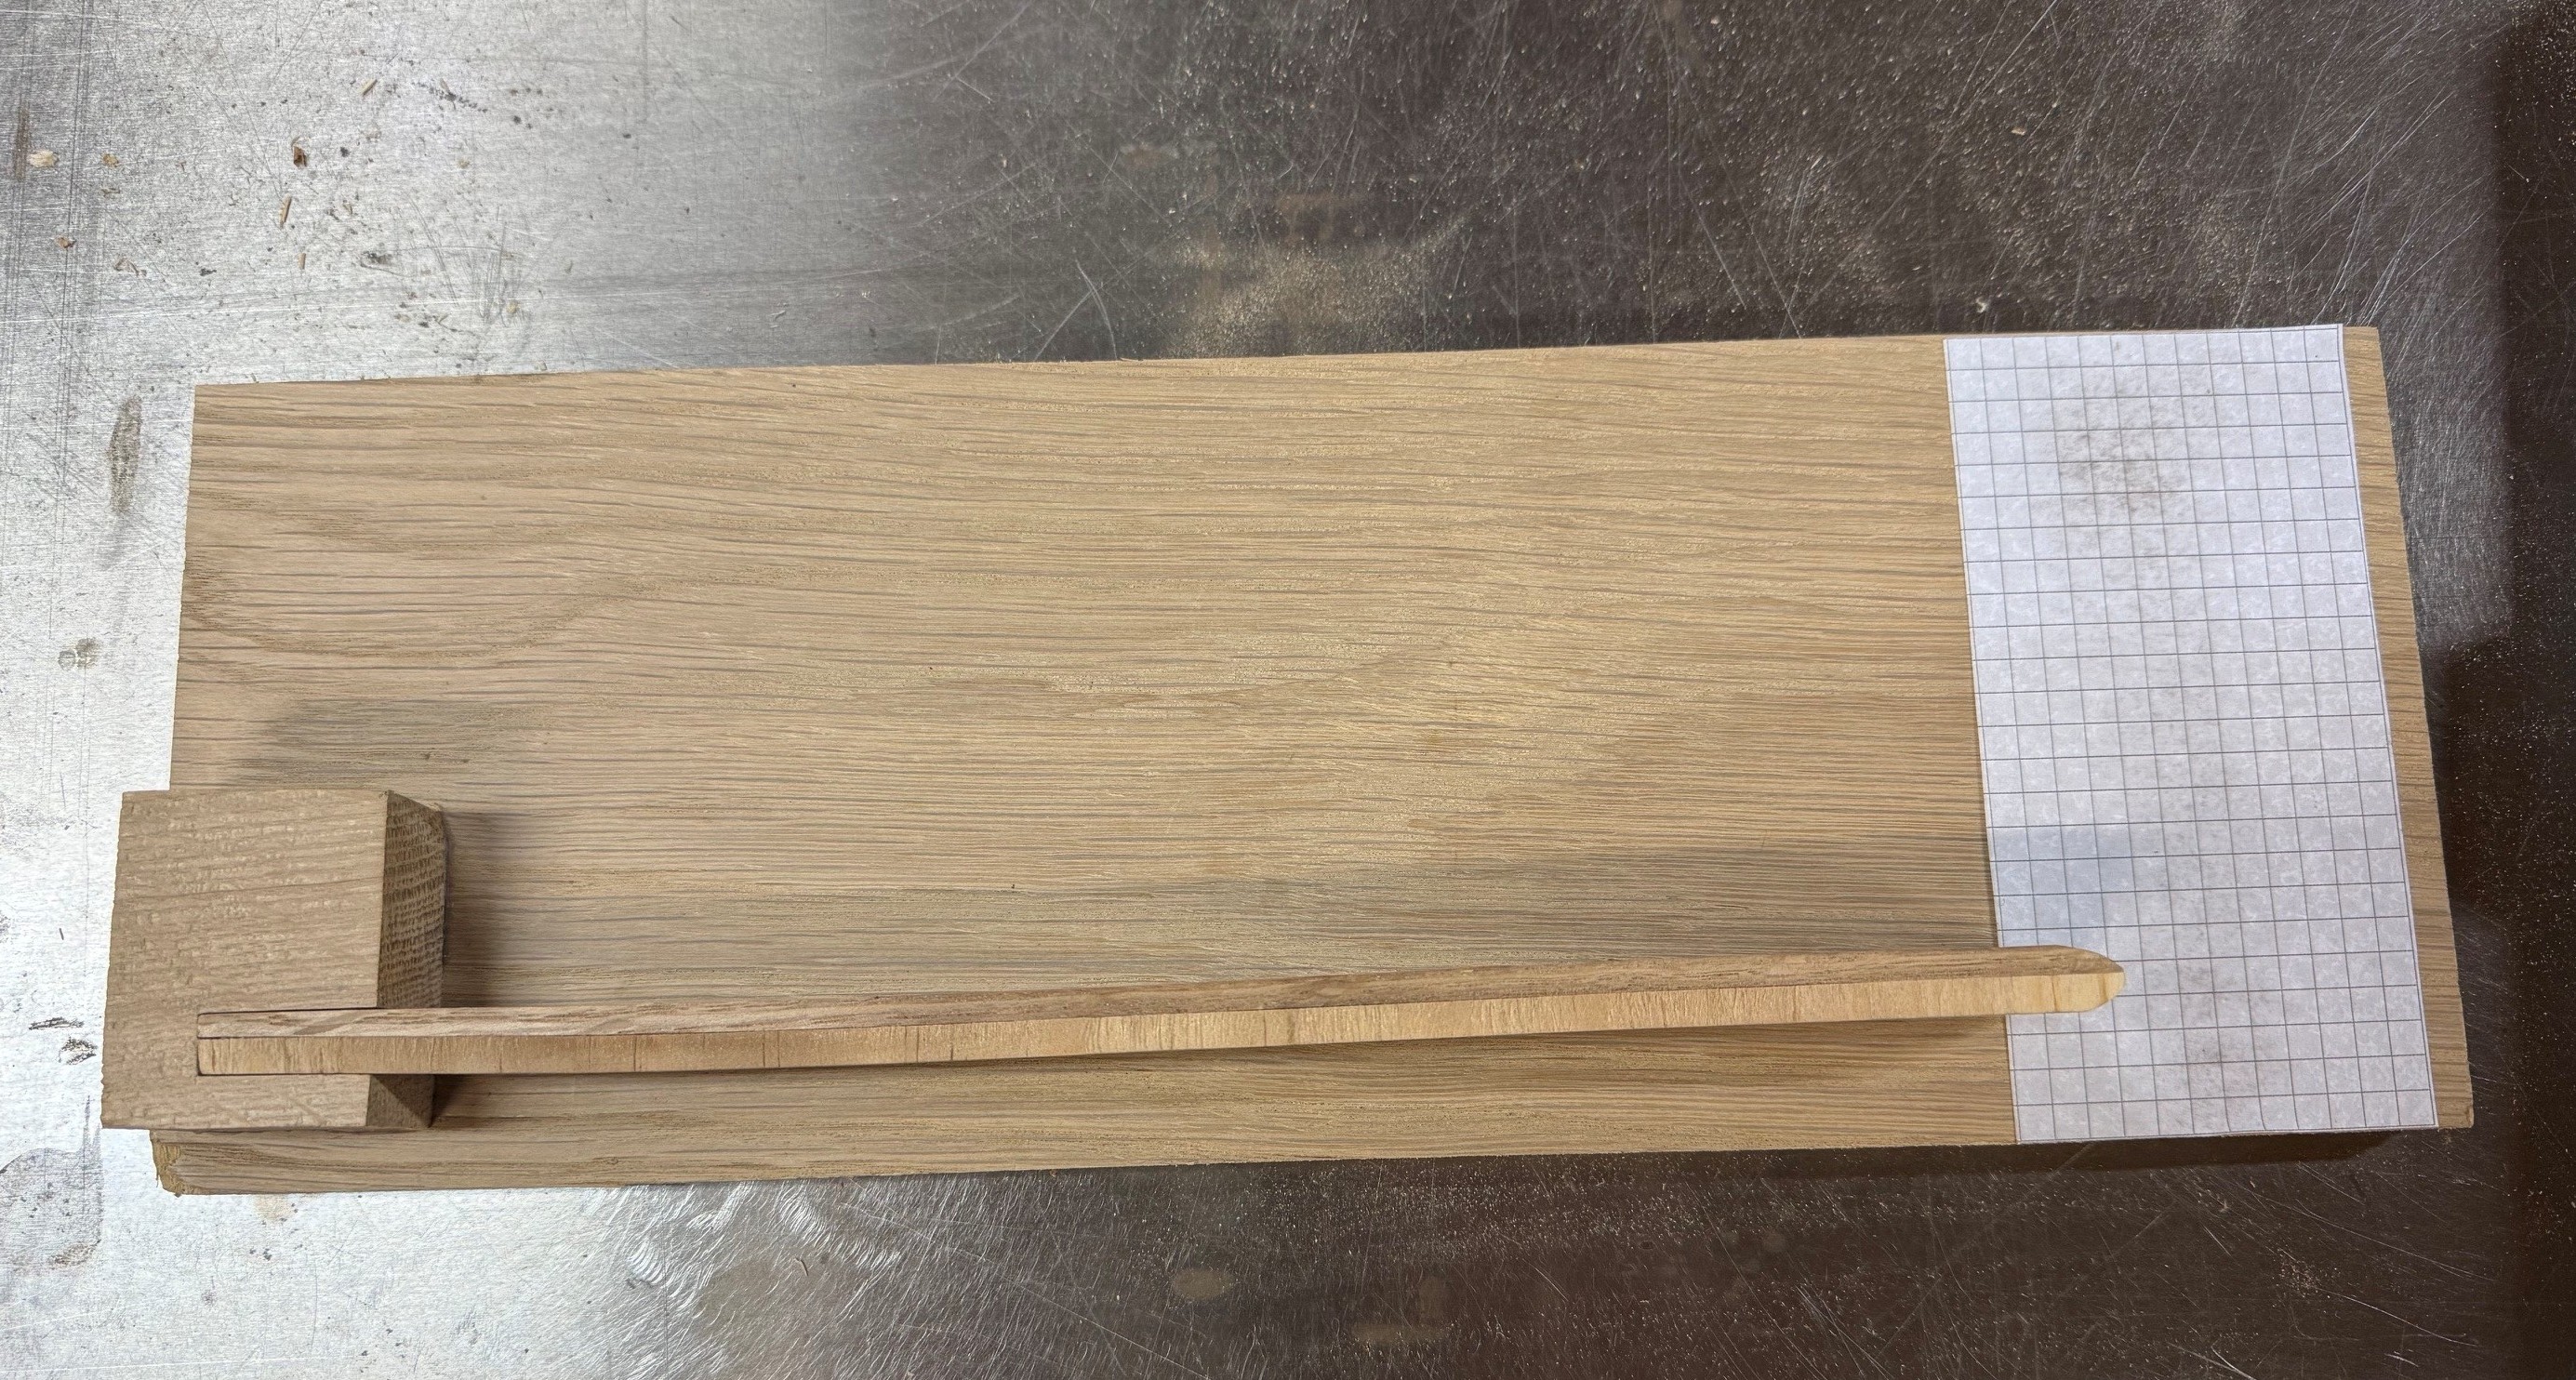
You simply mount the measuring stick into a small block that is glued to a plywood backing board. I put a piece of graph paper on the board to more easily measure the changes. You can compare results to a professional hygrometer reading to put numbers down, or just note the positions at different times of the year.
It’s a great conversation piece and a useful illustration and educational tool. I heard of a piano repairman who made a portable version in a nice wooden case that he would take with him to show clients when he would come to work on their pianos.


Have something to say? Share your thoughts with us in the comments below.