If you want to make something look older, just add some worm holes. Sounds simple enough, but there is a major difference between just poking holes in the wood and making the holes look authentic. Now that the all natural, rustic wood look is in style, even new, or at least not very old wood often benefits from more character, and I am here to show you how to really do it.
First off, let me assure you that I have a lot of experience in this field. I often build pieces that need to be “wormed up” in some regard, either to make new wood look old or to make old wood look even older. Especially on projects like beams and mantels, worm holes help add a lot of age to a piece.
Much of the wood that I use already has worm holes in it because I let the logs sit awhile outside before I mill them into lumber (sometimes even on purpose), so I have a head start, but there will still often be spots without bug holes where the wood needs a little extra love, like in the video above.
To get things started, it helps to first look at truly worm-eaten wood. There are consistencies even in what looks to be very inconsistent patterns. Here are a few principles that hold up in most wormy wood:
1.) Hole sizes vary: Even similar-sized holes are not the same. Your method for creating holes should easily produce random results.
2.) Worms tend to focus their efforts: Holes will usually have an area of focus, with more holes in the center of an infected area fading out to fewer holes.
3.) Not all holes are perpendicular to the surface: While most holes are just that – holes, many are oblong and some are more like trails.
4.) The bugs that make the worm holes often enter around defects in the wood: Soft or punky wood, spalted wood, cracks, and sapwood are all areas that will focus worm activity. Good, strong, solid heartwood is the last area to be bug infested.
5.) Small holes outnumber the big ones: Older wood that has been attacked by multiple insects will have lots of tiny holes (1/16′ diameter), some medium-sized holes (1/8″ diameter), and just a few big holes (up to 1/4″ diameter).
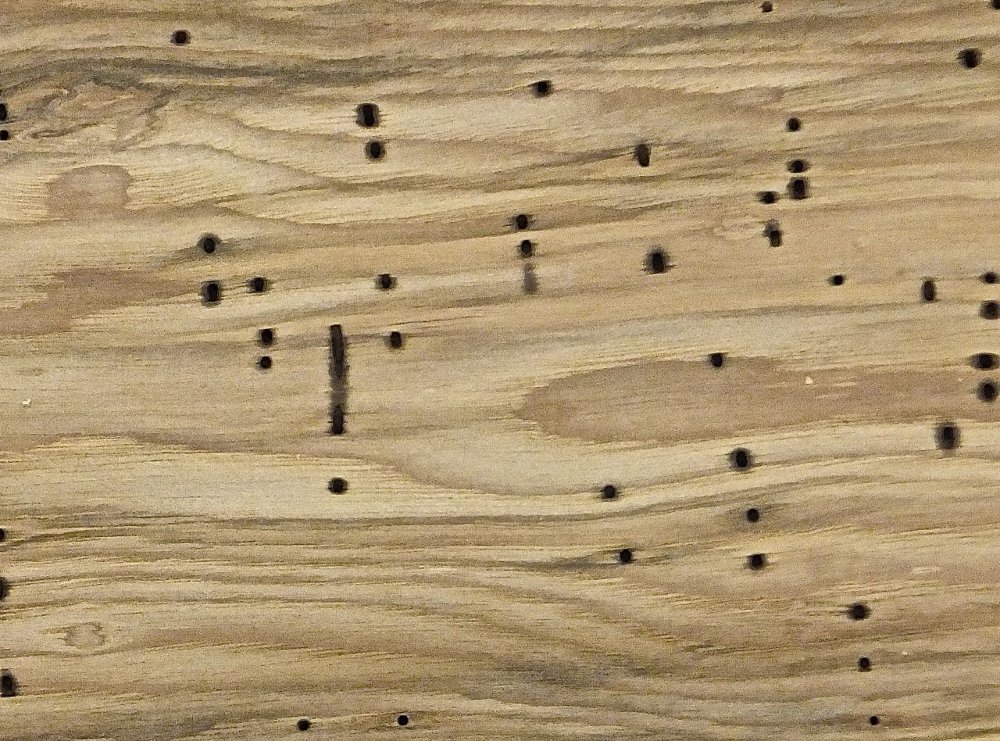
Here are some photos of authentic worm holes. If you can copy any these patterns you will be off to a good start.
This section of pine shows a nice array of hole sizes from large to small. Notice how the long holes follow the grain.
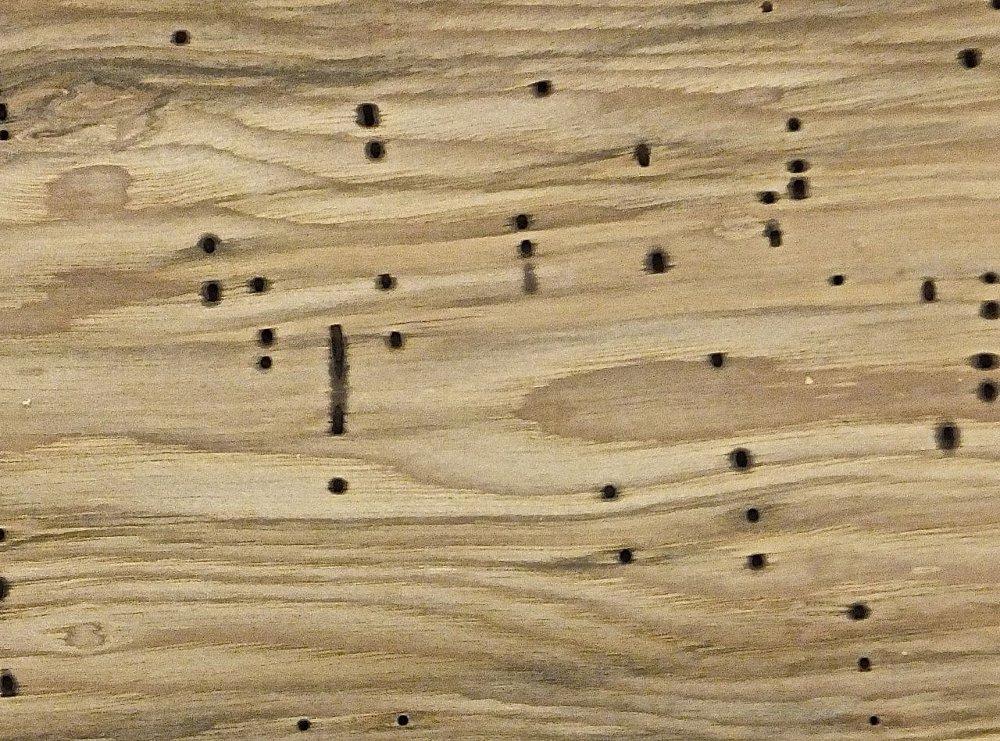
This section of hickory has holes that make short lines. They are also very dark and almost seem stained.
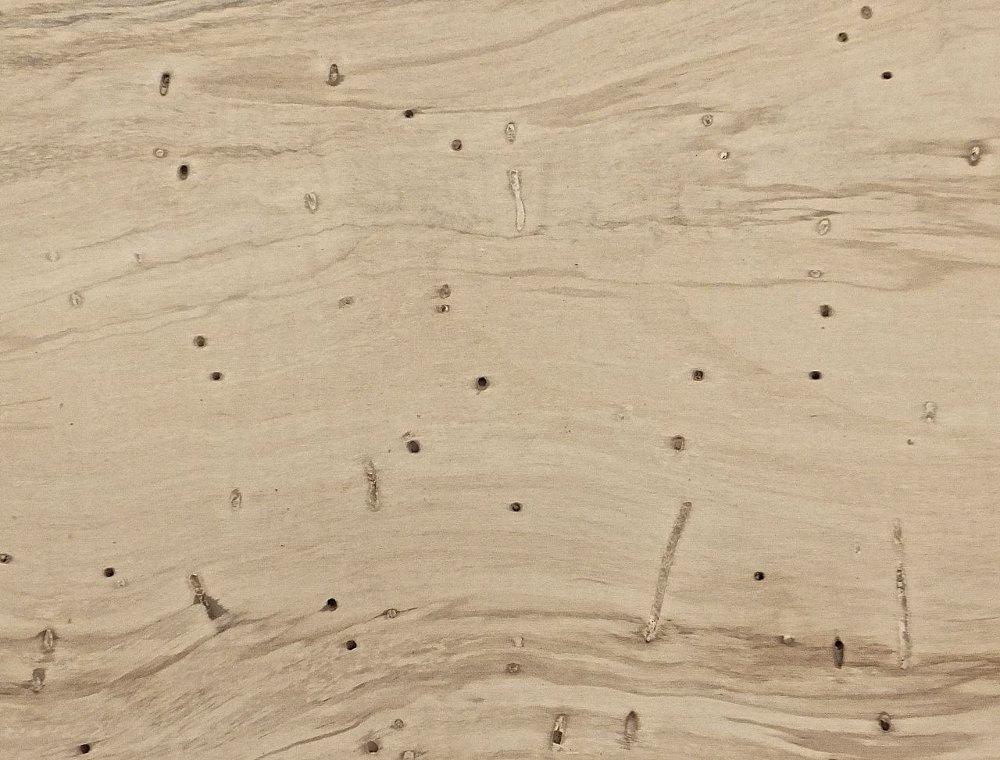
This section of maple shows a mix of holes and short trails.
The holes in this white oak are larger and have stains around them where the wood has started to decay.
Here are some of my tricks for achieving realistic results.


Have something to say? Share your thoughts with us in the comments below.