|
A Little About Faux Patinated FinishesBy Mac Simmons
As his business increased, the garage shop became too small and he moved into a larger shop. He already was doing very well when he read a book on finishing with chemicals, which he had never attempted to do. He thought this sounded like a unique way to color wood and, since no other finishing shops in his area were doing it, he decided to give it a try and bought all of the chemicals listed in the book. As time passed, he not only found out that the chemicals were difficult to obtain in small quantities, but also that they were very expensive. And even when he measured the chemicals carefully, the colors would be different on different sections of the same wood piece. However, he still was excited and amazed at this technique, and he loved showing customers his new chemically colored samples. One day when I paid him a visit, he was raving about a new technique he had learned from the book that involved using a mordant, which is a substance that permanently fixes a dye while making the chemical stain look like it is suspended between the wood and the coatings. He showed me a few pieces he had done with the mordant, and although the pieces all looked good, I did not see any significant differences in the mordant and chemical coloring than what he achieves with his regular pigmented and dye stains. So I told him that I thought he was wasting his time and money -a conclusion he reached several weeks later. He returned to using the same coloring system I had taught him a few years before. The point I want to make by sharing this anecdote is not that you should use pigments and dyes instead of chemicals. It is that you should always keep an open mind to trying new techniques and be aware that, in most cases, there is more than one way to get the job done.
I do believe that coloring with chemicals has a place in finishing, and there are specific chemical colors that will produce beautiful color stains. Each finisher should explore various materials; which colorants he chooses is a personal option. Each individual should decide what is best for him and the type of work that he will be doing. Creating Patinated Finishes Without Chemicals One novel technique that is done with various chemicals is the "patinated finish." A selection of chemicals is applied to pure silver, composition gold or silver leafing, with this technique, to produce unique and attractive finishes. However, I personally prefer not to work with the potent chemicals required to produce patinated finishes. My preference is to use a variety of colored glazes to create a faux patinated finish, which also achieves a nice look. To create a faux patinated look, I use silver leaf or the composition gold and silver leaf, not a pure gold leaf, since the chemicals do not affect the gold. I also have used metallic bronzing coatings for my base colors. When I use leafing I first apply a gold sizing onto the wood. You also can use varnish or polyurethane as your sizing. The sizing adheres to the wood and the leafing adheres to the sizing. You apply the sizing and wait for it to get tacky. Then you begin laying out the sheets of leafing, slightly overlapping each sheet until the entire surface is covered. When the sizing dries, the leaf will be bonded to the wood. I make sure that the leafing project is thoroughly dry and then use a flat brush to lightly fan off the overlapped leaf. Those fanned-off pieces can be saved and used to do repairs in any part of the leaf area that has defects.
When I use metallic bronzing coatings as my base and background color for a patinated finish, I also apply a clear coat or two to seal in the metallic colors. I do this to preserve the metallic colors so my colored glazes do not distort the brilliant background colors. You should always allow your clear coats to thoroughly dry before you begin any colored glazing process. Adding the Glaze The faux patinated finish is another one of the faux finishes where there are no set standards that you have to follow, leaving you free to be creative and do it any way you want. You can purchase a ready-to-use colored glaze or mix your own using universal, Japan or oil colorants; either tung or boiled linseed oil to make the glaze easier to work, and naphtha or mineral spirits as a solvent and carrier. Here is a suggested formula: 1 to 11?2 ounces of either one of the colorants, 3 to 4 ounces of either one of the drying oils, and 10 to 12 ounces of either one of the solvents. As with all formulas, adjustments may be needed due to differences in materials from different manufacturers and to the size of the pieces you are working on.
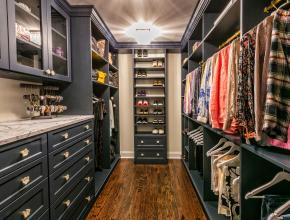
As you can see from these three attractive examples, faux patinated finishes are easy to learn to do, and they will add lots of panache to almost any project. This is another technique that is worth learning and adding to your finishing repertoire.
|


Have something to say? Share your thoughts with us in the comments below.