
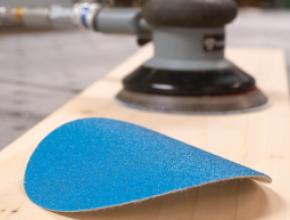
A dual action sander is a versatile tool that is often taken for granted in most applications and operations.
There is sometimes a misconception that the operator does not have to be trained since it is a relatively simple tool to operate. On the contrary, dual action sanding should be considered complex. It is a manual operation where the operator has to rely on his or her ability to remove surface defects and produce a consistent finish (defect free) at high production line rates.
As with any sanding or finishing operation, all aspects of the application are important. The dual action sander itself, the air supply, air hose, back-up pad and the abrasive, all play important roles. Any one of these alone can cause a defect to the workpiece. Here are 10 tips on better operation.
1. Start up the sander on the workpiece. This will eliminate the sander from digging into the surface.
2. Stop off. Eliminates the possibility of the sander walking across the surface causing wild scratches and allows the operator total control of the sander.
3. Do not sand at an angle to the workpiece. Sanding at an angle will cause gouges that are difficult to remove.
4. Always keep the sander flat on the workpiece surface. This will eliminate producing an irregular surface finish.
5. Avoid excessive pressure. Let the sander do the work, apply light to moderate pressure for consistent finish and removal rates.
6. Use an overlapping sanding motion with the grain of the wood. Sanding in only one area will change the finish of the wood and result in a change of appearance once the wood is finished. Sand the entire surface evenly to prevent blotching or spotting.
7. Use the correct grit size. Use 80 grit for rough removal of wood, plastic, paint, filler, putty. Use 100 – 150 grit for breaking edges and general clean-up or major repair. Use 150 – 220 grit for final inspection, touch-up and minor repairs. Use 180 – 320 grit for washcoat and sealer sanding. DA sanders create a finish that is approximately one to two grits finer than a sanding belt finish. Example: 220 grit belt = 50 or 180 grit disc.
8. Maintain the sander. Use an automatic lubricator to supply the correct weight and amount of air motor oil if environment permits. If it does not then manually lubricate tool (2-3 drops throughout the day) directly into the air inlet i.e. at start-up, morning break, lunch, afternoon break, end of shift – the muffler assembly should be removed during this process so that the oil will not clog it. This should be done in an enclosed area so that the exhausted air will not recirculate into the plant and cause finishing issues. Clean or replace exhaust muffler elements as needed and never operate a tool without one.
9. Use the proper air hose. Never use a coiled hose if possible as it restricts air more than a straight hose and often is longer than required. Hose should be as short as possible and never exceed 20 feet.
10. Couplers and plugs. Always use maximum flow couplers and plugs; they are 35 percent larger in diameter then standard ones and allow optimum air flow to the tool.


Have something to say? Share your thoughts with us in the comments below.