As I chronicle our journey of acquiring and implementing our CNC machine, no story would be complete without a rundown of our fails. Early on, while you are still learning the ins and outs of the machine, what it can do and what it can’t do, these failures come often and can be kind of demoralizing. Bits breaking, parts moving, time wasted. But, often times, failing is the best way to learn what not to do. So, with that in mind, lets look at some of our best failures.

We set up a shrine in the shop, along the back side of the CNC machine actually, as a constant reminder of our failures, with all the broken bits as a physical manifestation of our “newbie” knowledge.
Here is a short synopsis on how each one of them came to reside on the “Wall of Shame”
1. We tried to route a small 10″ diameter circle out of a block of solid cherry without securing it to a backer piece. The vacuum was not strong enough to hold such a small block of wood, the cherry moved, and the bit snapped. 3/4″ Compression -$80
2. We routed a 42″ diameter circle out of a mahogany glue up. Learning from our previous mistakes, we secured it to a sheet of 1/2″ melamine. Part way through the operation something seemed off…then the bit snapped. Come to find out, the bit was sliding out of the collet and cutting way to deep. More detail on that story later. 3/4″ Compression -$80
3. Two bits were broken in quick succession when we crashed the machine. I look back on that moment as the darkest time in our short stint as CNC operators. More on that below. 2 @ 3/4″ Compression -$160
4. We were making a template out of 1/2″ MDF and were routing out several small squares using a 1/4″ spiral bit. We took the cut way to fast…the little bit didn’t stand a chance. We saw sparks shoot up the dust collector tube and immediately hung our heads in shame. 1/4″ Upcut -$30

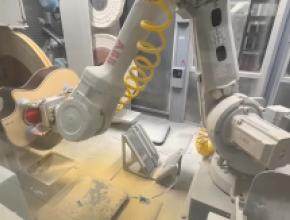
As previously mentioned, we crashed our CNC machine. Crashing the machine is when you tell the machine to download a tool into a currently occupied slot. In this case, my CNC operator (I’m looking at you Kyle) had just recently installed a new bit into a new toolholder. He placed it in the tool rack, but didn’t realize he put it into the wrong slot. He then told the machine to download its existing toolholder, which it tried to do, by smashing it into another toolholder. Metal smashing into metal is a disheartening sound, trust me. The machine dropped the toolholder it had in the head, right onto the hard and unforgiving concrete floor, breaking the bit.
I wrote about the entire incident in greater detail shortly after it happened. Thankfully, all is fixed and the machine is humming along.


Surfacing the spoilboard, and even replacing the spoilboard, are not difficult tasks to execute now that we have done them over and over again, but early on even the simple task of surfacing the spoilboard was stress-inducing. I present you with exhibit A. We needed to surface the spoilboard, and while monkeying around with the software interface, we saw a little radio button and couldn’t remember if the tech told us to keep it checked or unchecked.
Here is the thing with the initial 3-5 day training session…it is a flood of information. There is no way you can remember every detail! At the very best, you will have a faint notion that you were taught that specific detail which may help you a bit in your hunt for the answer.
Anyway, back to the little button. Do we keep it checked or uncheck it? We decided to uncheck it…WRONG! The 4″ diameter spoilboard cutterhead proceeded to chew away a 6″ corner of the MDF before Kyle and I could jump through the light fence and stop the machine.
I guess now we know what that check box controls!


The last example of our incompetency is the time a bit loosened from the collet and proceeded to drop deeper and deeper, cutting into the spoilboard and a little into the phenolic top. We do not have a torque wrench to measure the force at which we are tightening the bits, and obviously one was a bit loose. We were cutting a 36″ diameter circle out of a solid wood blank when Kyle and I noticed something was not quite right. The machine was programmed to be cutting only .25″ deep each pass, but it sure seemed like this last pass was cutting deeper than that! Sure enough, during the last pass, the bit began to loosen up and cut deeper and deeper, eventually breaking the bit.
All of these mistakes are becoming ancient history to us, as we have had a clean record for months now. Our example of learning the hard way may not be ideal, but it sure is one way to learn what not to do, very quickly!


Have something to say? Share your thoughts with us in the comments below.