
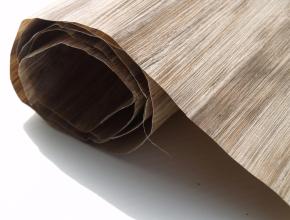
 The preferred way to apply flexible wood veneer is with a vacuum press or a cold or hot press with yellow or white glue. That said, when a press is unavailable a good quality contact cement will do the job well. The following eight tips will help ensure a successful contact cement installation.
#1 Use a Good Quality Cement
Use a good quality contact cement with the highest level of solids. Keep in mind that flammable contact cement works better than non-flammable. While the better contact cement will be most expensive, it is cheaper in the long run to have a successful seal the first time.
#2 Climatize the Veneer
Climatize before installation. Put the sheet or sheets of veneer and the substrate in the environment where it will be applied for 48 hours before starting the installation process. Also make certain that all surfaces are wiped clear of dust before application.
|
Titebond Contact • Application Temperature: Above 50°F. • Open assembly time: 15 minutes (70°F./50% RH) • Total assembly time: 15-20 minutes (70°F./50%RH) • Minimum required spread: Approximately 6 mils or 250 square feet per gallon • Required pressure application: 100-250 psi, depending on substrates • Method of Application: For most consistent coverage a mechanical spreader is recommended. • Cleanup: Damp cloth while glue is wet. Scrape off and sand dried excess. |

#3 Stir the Glue Before Use
Stir the contact cement before EACH use, just as you would with paint. This is critical and will prevent many adhesion problems.
#4 Choose the Right Substrate
Apply to the appropriate substrate. MDF (medium density fiberboard) is the best for veneer application with contact cement. The second best choice is particleboard, followed by plywood. The least suitable wood surface is hardwood. (Obviously do not apply wood veneer directly to drywall, plaster wall or concrete. Instead first apply to MDF and then install the MDF board on these surfaces. Be sure to apply a sheet of wood veneer on the back side of the veneered surface to stabilize the board and prevent future warping.)
#5 Check Ambient Humidity
Check the room humidity before starting application. Humidity must be less than 51% or humidity trapped between the substrate and the veneer may cause problems, such as cracking or bubbling, after installation.
#6 Two Coats, Dry in Between
Use two coats of contact cement on the substrate, making certain to let the first coat dry before applying the second coat. If the surface is even the least bit tacky, it is NOT ready for the second coat. One coat is all that's needed on the back of the sheet of veneer.
#7 Use a Board as Squeegee
Use a scrap piece of wood roughly 12” x 6”, rather than a J roller, which will not be as effective. Hold the wood in both hands and use as a squeegee to spread the cement and push the surfaces tightly together, moving from the center to the edges.
#8 Fully Dry Before Finishing
Allow dry time of 24 hours before applying finish, once again, to prevent any interaction between the contact cement and the finish.


Have something to say? Share your thoughts with us in the comments below.