 Last week I discussed factors to consider when buying machinery for the shop. For us, it was not just growth but we also wanted to increase efficiency and the quality of the process being performed.
With that in mind, here's a look at some of the equipment we purchased.
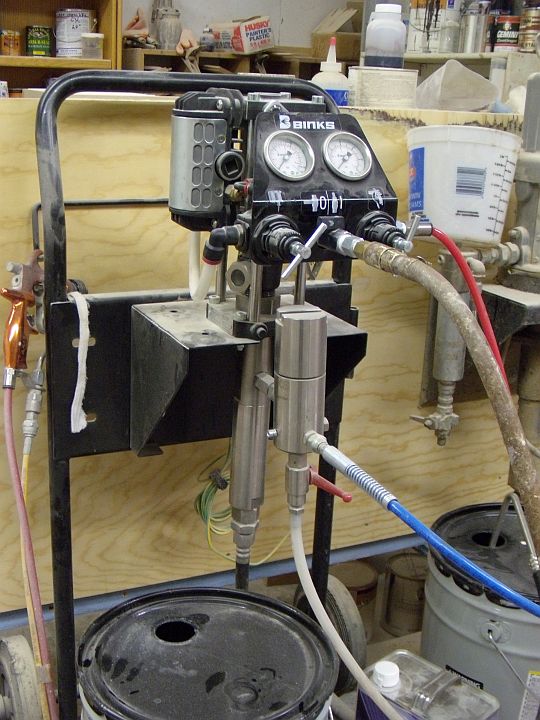
Air Assisted Airless Sprayer: Shortly after purchasing the sliding table saw, the next area of  production that we realized we needed to address was our finishing process. We finish all of the furniture, cabinetry, and shutters that we manufacture. Prior to manufacturing furniture and cabinetry, we finished our interior shutters using pressure pots to spray oil based paints and lacquer. But once we began fabricating and finishing cabinets and furniture, we learned that a pressure pot was not the best way to spray sanding sealer, lacquer, or varnish. The pressure pots just created to much overspray, resulting in a rough finish on large flat surfaces, such as a table top, or when spraying the inside of a cabinet. The quality of our painted and lacquer finishes was not to our liking, so we began investigating our options.
We met with our finishing rep and decided to spend $2000 on a new Binks air-assisted airless spray system, complete with the pump, hoses, and gun. The overspray is pretty much non-existent and the volume of material that is applied to the surface is greatly increased over the pressure pots.
The resulting finish achieved using the air-assisted airless is incredible! Perfectly smooth surfaces on large dining tables and inside of bookcases. We also switched over to using tinted lacquers to paint all of our furniture and cabinetry. We still use pressure pots to apply the oil based paints to our shutters, and to apply stain to all of our products, but when it comes to spraying sealers, lacquers, and varnishes, we go with the air-assisted airless.
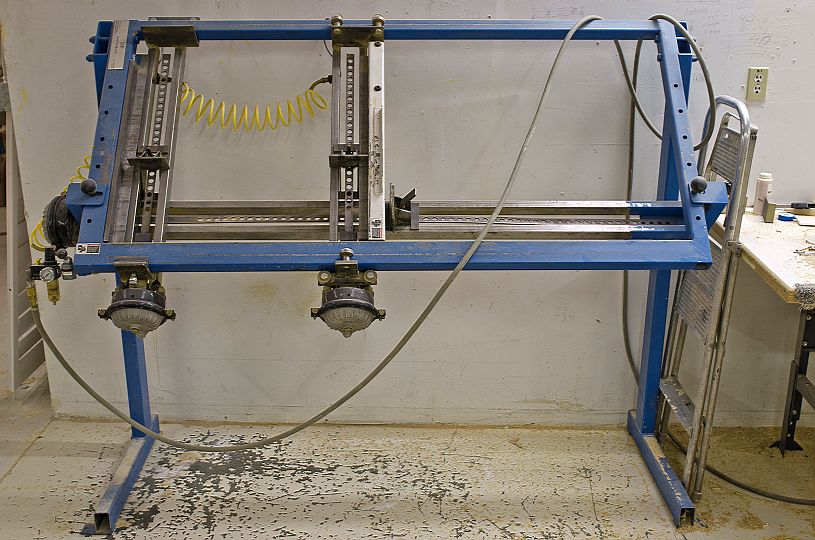
 JLT Door Clamp: After purchasing the air-assisted airless, our sabbatical from purchasing new machinery came to an end when the owner of a local cabinet shop, who had done some edgebanding for us, called to see if I was interested in a few machines he wanted to part with. The JLT door clamp, seen above, and the Busellato UniBohr machine, seen below, were taking up space and collecting dust, and he wanted them gone. He said they could be mine, along with an air-assisted airless pump, for $1800. It didn’t take much convincing for me to jump at the opportunity, since I had almost purchased the UniBohr machine the previous year from him for $1800. For the same price I was getting two more machines!
Let’s first look at the JLT door clamp. Prior to this machine, we were building all of our doors using parallel bar clamps, which get the job done, but makes the process of building doors tedious and inaccurate. Building perfectly square doors was tricky and elusive. I don’t know if I was unwilling to spend the money, or if I was just unaware of the ease and accuracy this machines lends to building doors, but until this offer, I had no plans to purchase a door clamp machine. If you build your own doors, this is the next machine you need to purchase! The quality of our doors is infinitely improved. Every door is square, all the seams between the rails and stiles are tight and secure, and the door is clamped up tight in about 5 seconds!
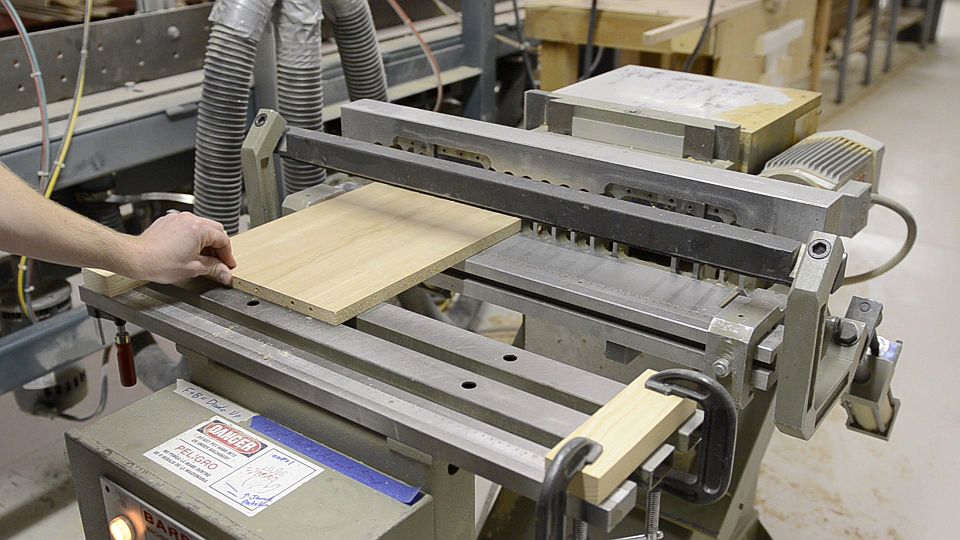
 Busellato UniBohr Machine: The other machine we acquired from that group purchase was this Unibohr drilling machine. As detailed in the previous machine blog entry, we were drilling all of our system holes using a Blum MiniDrill, so we planned on using this machine to drill all the drawer parts. This machine can bore horizontally into the end of the fronts and backs, as seen in the picture, and with the flip of two switches, the entire head swivels 180 degrees and the drill bits bore perpendicular into the sides.
Before we purchased this machine, fabricating drawer boxes was little more than a nightmare. We were using a shop-made jig and a collared drill bit to manually bore our drawer parts. As you can imagine, accuracy was not its strong point. As with so many shop built jigs, the more we used it, the further out of alignment and the looser its tolerances became. Eventually, it was not worth it anymore and we relegated it to some dusty corner of the shop.
Next, I attempt to solve this issue with a machine we already owned. We use a 97 head Marcon drill machine to bore the holes in the stiles of our shutters, but the drilling depth and fence settings could not be touched. So, I designed and fabricated some jigs and all was well, until we ran into the same problem as before: the tolerances and alignment were compromised little by little by normal wear and tear. Thankfully, about this time is when we purchased the Unibohr, so after a few hours of adjustment and fine tuning, we had beautifully bored drawer parts.
We will pick up this story next time with plenty more new equipment.


Have something to say? Share your thoughts with us in the comments below.