 |
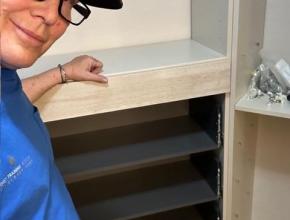
Ray Drazen, R&P Enterprises, makes cutting tools
in house for his SCMI moulders.
|
Restoration & Preservation Enterprises, Kankakee, IL, has established a reputation among architects and contractors for handling window renovation projects around the country, some running into the hundreds of pieces. Since many of these are registered historic projects, they require precisely machined recreations of the original wood moulding from antique wood window brickframes.
To accomplish this, owner Ray Drazen has adapted a process for digitizing the original wood brick frame profiles, then converting this to a file template from which he produces his own moulder cutting tools in house.
âA minimum of three custom knives and two CNC router bits are needed for every project,â says Drazen. âHowever we have needed over 12 sets of knives for some projects due to moulding variations from floor to floor in the buildings we work on. By having the ability to grind our own knives it not only produces a better end product - because we can sharpen periodically over the course of a run- but it allows us a quicker turnaround time on our product. The more we can do or rather the more self sufficient we are aids us in controlling the end product and lead times.â
Using the digital approach improves the precision of the process, develops more exact knives and cuts down some of the labor cost as well.
âIf it is an existing wood frame, we start by removing an 1/8 inch slice of the moulding profile, which we then scan into the computer,â says Drazen. âWith the image imported into the computer, we refine it until it matches the profile exactly.â Alternatively he can sketch the profile by hand and scan that image in or take it directly from the architect's drawings.
Drazen uses a Tem Tech to cut a template based on the scanned slice of wood, sketch or drawing of the profile. Template Cut Shop software allows the image to be rastered which outlines the profile of the molding. (It can also import files directly from a CAD drawings.) This file will be converted to G-code to drive the CNC moulder after the drawing is trued up to the profile.
The next step is to establish the offset of the cut and create the template. The template will guide the tool-cutting system or grinder as it cuts the tool from the knife stock blank, similar to cutting a house key from a blank.
âIf it is a five inch profile, I go with 5.5 inch template which gives us the ability to adjust knife in and out.â
From the template, Drazen uses an SCM profile grinder to cut the tools, starting from various sized blanks.
âIn choosing a knife stock, Iâll select from 1.75-inch to 2.25-inch, depending on depth of profile and width of the board weâre cutting in the moulder,â he says. âWhen you are choosing the knife stock, you also make sure it is thick enough so you can get several sharpenings on it.â
After cutting the knife stock to the width of the template, âthen I put them on a tip scale to balance the knife stock and ensure the knives are equal in weight,â says Drazen. He will make small cuts in the backside of the tooling steel of the knives as he adjusts them.âThe closer and more balanced the knives are the better the finish. You avoid getting hop, chatter and knife marks from being out of balance as the blades rotate in the molder,â Drazen says.
The blanks or knife stock are ground within .015 thousandth of an inch of the template during the roughing cut on the profile grinder. The roughing cut is where you remove most of the steel from the knife stock as you follow the template of the profile.
âYou are just ahead of where you need to be,â Drazen explains. He cuts that in three stepsâdressing the cutting wheel and cutting away .007 thousandth of an inch, then regrind it at a slower feed, to remove another .007 thousandth of an inch.
âWhen you are doing finish cuts, you use a constant fluid movement,â he explains. At this point there is .001 thousandth of an inch remaining to be cut away from the blade.
âWhen we go to get our final cut, the coolant on the machine is shut off and the grinding wheel is dressed. That finish cut is called your âsparkingâ--that is when the actual sharpening occurs. The sparking is what really polishes the knife and gives a sharp, clean surface.â
As a last step, he lays the knife on the original piece of molding to see if they match. âIn our case if you can see any light between the knife and the original molding, we do it all over again until itâs perfect. Before we begin grinding the knife, we also do the same check with the template to the molding. There is no reason to waste the grinding time and labor if the template is not perfect first.â
Read related articles: Wood Window Restoration Expert Goes High Tech


Have something to say? Share your thoughts with us in the comments below.