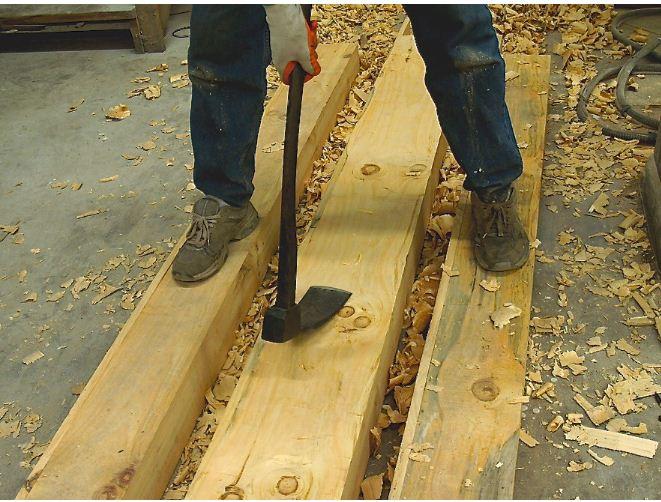
If you are looking for a way to work out your frustrations, boy do I have a job for you. It also helps if you are looking for a backache and blisters as a bonus. This job involves the simplest of tools and the weakest of minds. It’s simple. Take some wood and whack away at it. Then whack some more. Then a little more. That’s all there is to it (at least to the first part).
The fun part for me starts after the grunt work is done. That’s when I get to stop complaining about the backache and blisters and let my softer, more artsy side come out. I get to play with my paint brushes and spray gun and try to make my recent work look like it has been there for a long, long time.
I may not enjoy it as much as the finishing, but the work that leads up to the finishing is really just as important. I usually start with White Pine because it is easy to work, takes a nice dent, and if the log isn’t new, it can have a lot of character. From a lumber processing standpoint, I like that it is easy to mill, the boards stay flat, and it is quick to dry. I also use White Pine because I can get long logs and the wood is lightweight, which is good for big beams that need to be installed inside without a crane. In instances where I can use a hollow beam it is especially lightweight.
For the job that I specifically reference for this post, I used solid wood for the mantelpiece and made up hollow beams to be applied on the bottom side of an already-finished vaulted ceiling. The solid wood looks slightly more authentic because it benefits from deep cracks that occur during drying. After all the pieces are done, the cracks, or lack of them, are the only way to differentiate between the hollow and solid pieces.
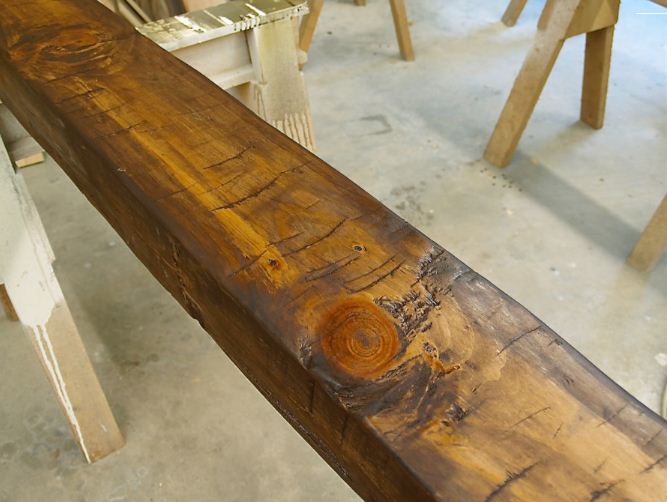
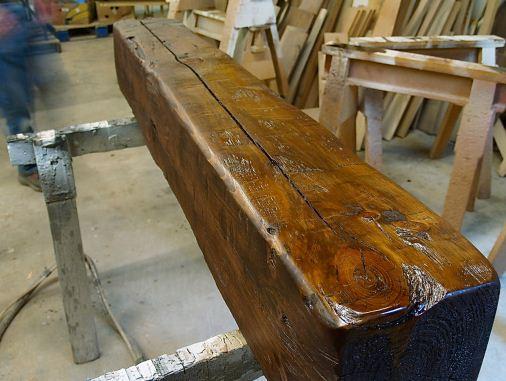
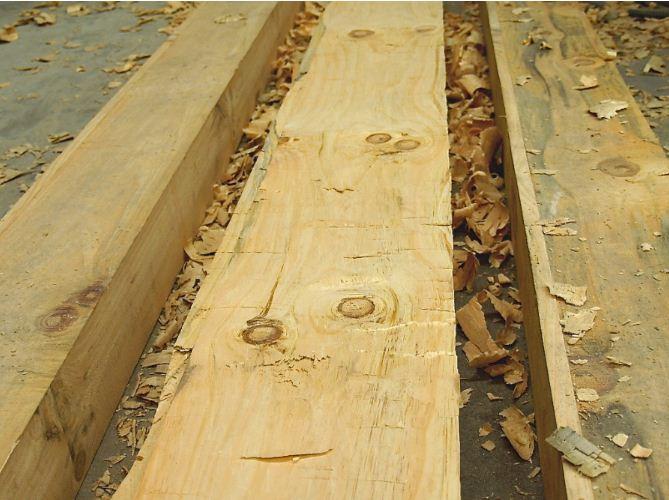
The first step in making new wood look old is adding texture to the surface. From tool marks, to bug holes and cracks, old wood has texture. The more texture that you add, the more authentic the piece will look. It is easy to identify a piece that is not legitimately old because it doesn’t have enough texture. We have all seen cabinets that are distressed by adding a couple of bug holes and a few dents and then sent on their merry way. They might have the right overall feel, but no one will believe that they are old. In this case, don’t hold back and don’t get lazy.
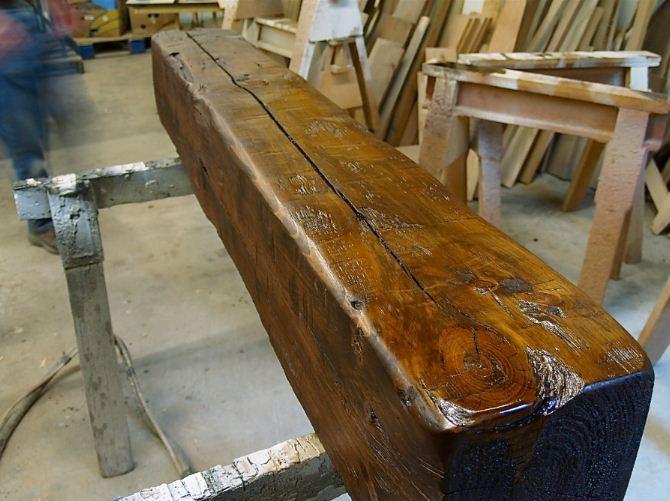
For this project the surface was finished with an adze, but I often hand plane or use rough cut lumber with band saw or circular saw marks. After the pieces were worked with my new-to-me antique adze (that I got for $27 on ebay), I sanded the surface until it was smooth overall, but still had pronounced tool marks. Bigger pieces like these are usually viewed from a distance. Don’t be afraid to make obvious tool marks. If using a hand plane, set it deeper and stop at the end of the cut to tear off the chip.
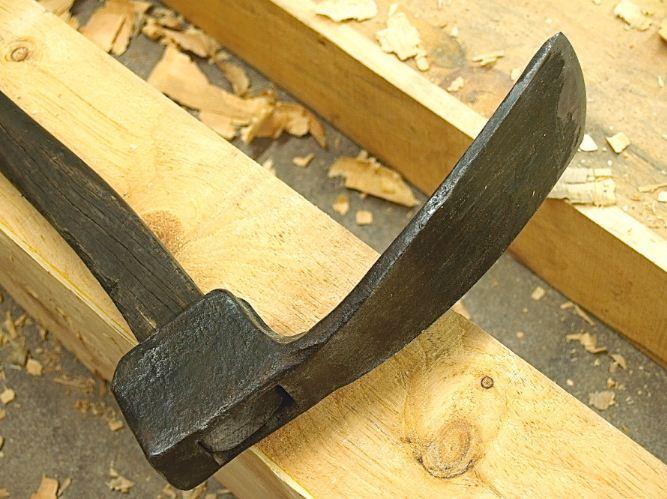
In old pieces of wood like these the corners are usually rounded, dented or busted of. My favorite tool to use for the corners is a drawknife. It quickly removes material and you can change the depth of cut by adjusting the angle of attack. Be sure to pay attention to the grain of the wood. If the drawknife wants to dig in turn around and work from the opposite direction. The same holds true for the adze, especially around knots, where the direction of attack can make the difference between producing a chip and removing a giant chunk.
After the hand tools, I like to hit the surface with a sander to make the surface look slightly worn instead of freshly cut. Sand more where a piece would have been worn from hundreds of years of use. Tabletops are worn where people sit, posts are worn where people grab them, and furniture bases are worn where people kick them. In this case, all of the work was up high except for the mantelpiece, which was the only one that would have any wear from use.
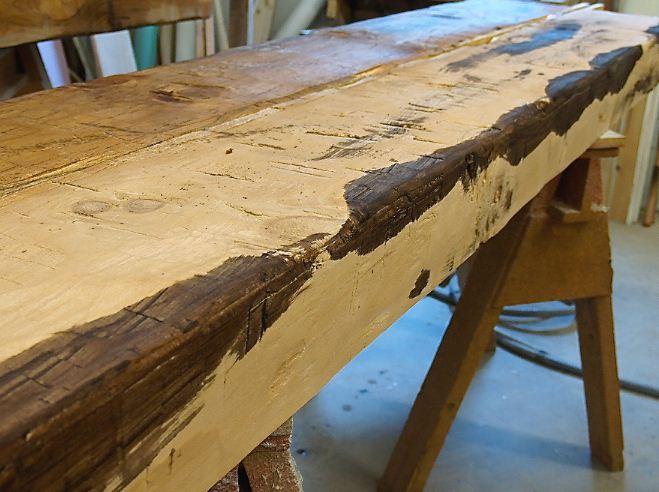
Once the surface is prepped, it is time to start the staining. A truly old piece of wood has many different colors, and if you try to stain a new piece of wood with just one coat of stain, it will look flat. Even subtle differences in the colors can add a lot to the final effect. I like to use several colors of dye stains, on the surface of the wood and added to my finish, to build up to my final color. In this case the final color was fairly dark, so I had a lot of room to work before things got too dark.
The first coat of stain was TransTint Dark Mission Brown mixed with a little water and applied with a brush to the dry wood. I worked the corners along the length of the beams to simulate the sapwood, which is naturally darker in the older pine. The extra effort on the corners also helps camouflage the seam on the hollow beams. The next coat was a very diluted mixture of Honey Amber and Medium Brown TransTint that I quickly sprayed with my hvlp gun to make the new pine color similar to antique pine. This is where the water-based stains shine. The lighter color and darker color bleed into each other and start to blend. If the color is too dark it can be lightened with more water, if it is too light just add more stain.
The next step was to seal the surface with two coats of tinted sanding sealer. For these coats, I added a little Medium Brown TransTint to the sanding sealer. This darkens the color overall, helping me sneak up on the final color. It also seals the surface for the next step.
After the sealer dried, I used a Walnut Minwax gel stain. The gel stain (glazing) over the sealer only slightly darkens the surface, but it will get into, and highlight, the cracks and crevices. This is a good spot to add even more contrast by varying the amount that you leave on the surface.
The gel stain officially takes a day to dry, but I spray lacquer over it almost immediately with no problems. This last coat can be clear if the color looks good already or TransTint can be added to darken it. In my case, all of the coats of lacquer, sealer and topcoats, were lightly tinted.
This entire process takes a little more effort than just applying one coat of stain, but I think the results are more than worthwhile, and now I can’t do it any other way. Once you see how authentic this process looks, especially in person, you won’t want to do it any other way either.


Have something to say? Share your thoughts with us in the comments below.