 A girl's bedroom structure was built and installed for the same client as the boys bedroom structure we described a few weeks ago.
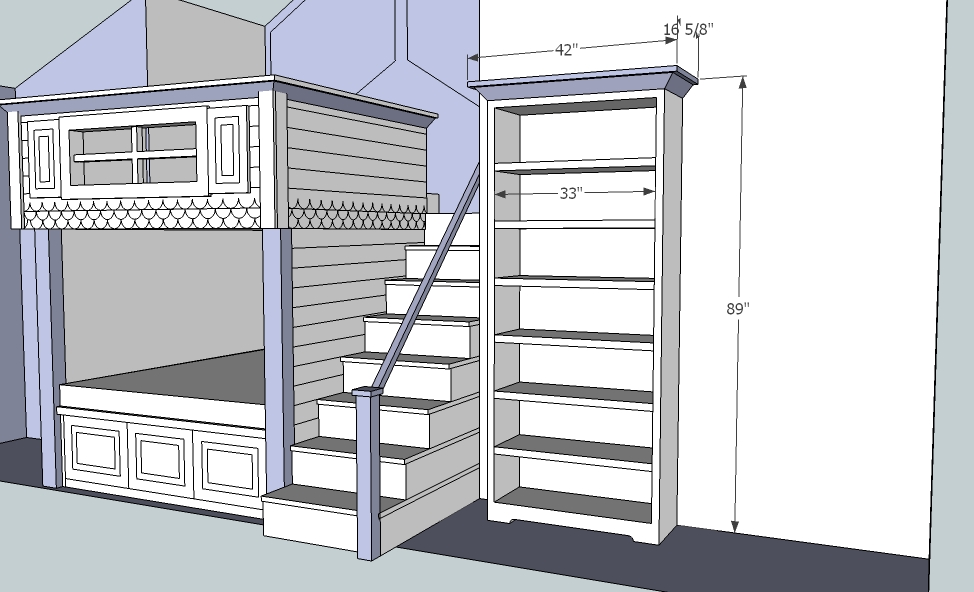
The girls bedroom was a bit more compact than the boys, but there were far more details being incorporated into that “smaller” package. Essentially, the girls bed structure was mimicing a small house, or a large doll house, depending on how you look at it.
The girls room structure is similar to the boys bedroom, in that they both consist of a lower bed, sitting atop a platform with drawers underneath, and an upper bed, sitting on a platform directly above the lower bed.

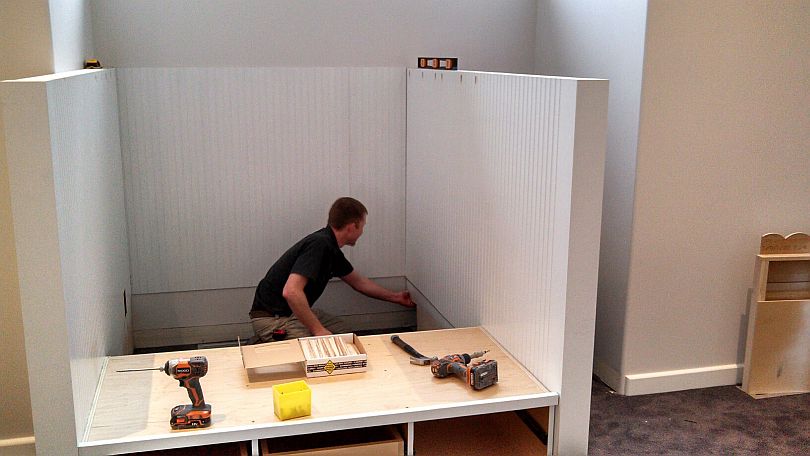
After hauling in a metric ton of parts up two flights of stairs, we were thoroughly exhausted, and we had barely begun! Just like in the boy’s bedroom, we would be installing the structure directly on the carpet, rather than cutting it away and installing on the sub-floor. Thankfully, the carpet was fairly firm, so leveling the parts was not to difficult. Once we removed the baseboards, we could begin the installation.

We began by connecting the first wall to the left side of the alcove, followed by the back and right walls, creating a three sides box. Each wall was a 3″ thick torsion box, with exterior siding on the outside and beadboard on the inside. The 1/4″ beadboard was backed by 1/2″ MDF to create a strong rigid wall on the inside. The front ends of the left and right walls were trimmed in 3/4″ thick poplar.
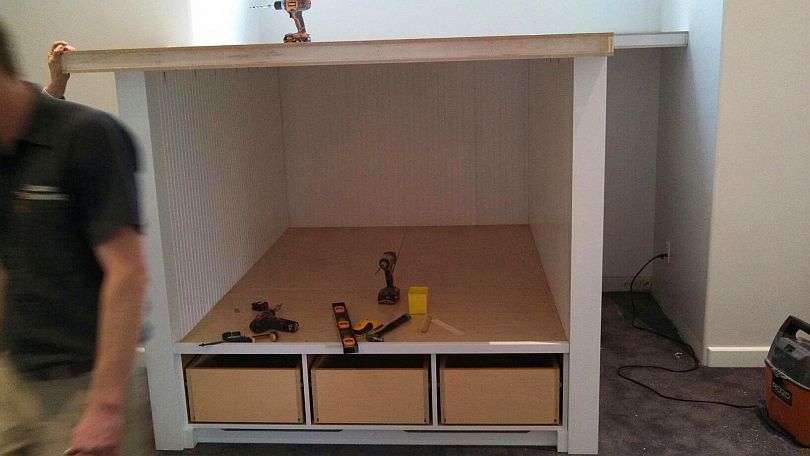
Once we levelled and plumbed each wall, pocket screws were driven into the studs through the top, and access holes were cut in the unseen lower portions of the wall, and cabinet screw used to secure the bottom. Next, we installed the bed platform/drawer cabinet, which connected the side walls together, and added some much needed rigidity. So, without to much difficulty, we had the framework of the structure in place.

The unit really began taking shape after we installed the two upper floors and the back portion of the bed platform. The upper floors were also 3″ thick torsion boxes, skinned using 1/2″ MDF, making the upper floor stiff enough to hold several adults without flexing. The back of the bed platform was two pieces of 3/4″ maple plywood, resting on a framework of plywood joists. Notice the small notches cut into the top of the baseboard in the front of the bed cabinet. The vents along the back wall were ducted directly underneath the bed cabinet, and the small notches allowed the air to vent into the room without being visible to the occupants.

With the base unit assembled, it was time to turn our attention to the upper portion. The top consisted of three walls, a roof cap, and crown moulding. Each wall only had the outer skin installed in the shop. The beaboard on the inside of the wall was left off, so we could connect the walls to the floor, connect the walls to each other, and connect the roof cap to the walls through the inside, thereby hiding all of our fasteners. We began with left wall and worked our way around. Once we had connected each wall, we installed the wall cap, the beadboard panelling on the inside, and the crown moulding. With the addition of two exterior raised panel shutters, this thing was beginning to look like a small house after all.
The most difficult aspect of the whole project was up next. The staircase was made up of seven cabinet boxes, one for each tread, all stacked atop one another, screwed together, and fit in between the outer wall of the “house” and the sheetrock wall of the actual house. We started by connecting the bottom four stair treads together, adding the two applied panels, and sliding the entire assembly into place. After we leveled and plumbed the stairs, we permanently attached them to the torsion box wall on the left, and to the framework of the house on the right, thereby locking everything securely into place.

We were then able to install the final three stair treads in much the same way. The last step was not a physical box, but rather just a stringer, making up the difference in height left over after all the steps were stacked up and installed. This gave us a bit of breathing room during the install. Rather than connecting eight stair treads together into one gigantic assembly, trying to muscle them into place, and achieve the exact height of the upper floor, we were able to assemble in stages and build into the design a little breathing room.
Next, we installed the stair faces, the first five of which were drawers operated with push-to-open ball-bearing slides, the end panel on the right side of the staircase, and a railing to keep the kids from falling off the side. A free-standing bookcase, and a reading light inside the bed area, put the finishing touches on this project.
The final product turned out pretty awesome in our opinion and, more importantly, the customer agreed!


Have something to say? Share your thoughts with us in the comments below.