A year or so ago, we were asked to make a veneered maple desk, like we had made previously, but construct it in such a way that the legs could be removed from the top. We are always up for a challenge, and this certainly was a challenge. Not only did we have to re-order the process in which we built the desk, but we had to engineer a way to make the legs rock solid when attached to the top, yet be easily removable.
The range of options was quickly narrowed down to two candidates: heavy-duty cam-locks, which would have to use a stabilizing stringer running underneath the desk top, or steel plates, permanently connected to top, and bolts, which would be inside the legs and would bolt into the steel plates. In the end, we decided to go with the steel plates for several reasons. The steel plates would allow us to forgo the use of an additional stringer under the desk top, but more importantly, we were unable to find cam-locks that were large enough for this application. Hafele has a wide variety of cam locks, the largest of which are 35mm in diameter, but we still felt like this would not be an adequate long-term option for this desk, since there is a very good possibility that the bolt on the cam lock would work their way loose over time.
We knew that with this desk, as with many of our custom pieces, we would start out with a design and a game plan, but would have to improvise and adjust throughout the build process in order to achieve the best product in the end.

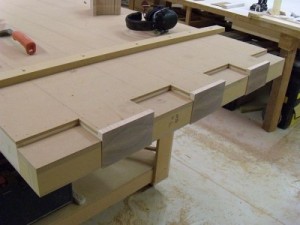
We began by building the torsion box for the top in the usual way, except for the fact that the bottom skin had no notches at the ends, since we were not mating the legs into the top. While the ends of the bottom skin were flat, the ends of the top skin were notched, since we need the desk to look like it was connected via box joints.
After constructing the internal framework and skins, we glued the maple end-grain blocks onto the ends, and built-up the open box joints with layers of euro-ply until the gap at the top was the correct size for the maple blocks that would be added later.

Next, we rolled on a nice layer of Titebond’s cold press veneer glue, applied a sheet of maple veneer, slid the entire table top into our 5×12 vacuum bag, and walked away.

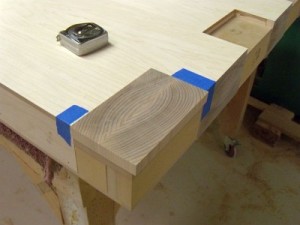
After four hours or so, once the glue had a chance to set up, we removed the desk top from the vacuum bag and let it sit overnight to completely cure. We then flush trimmed the excess veneer, carefully cutting away each corner, and then started on cutting and fitting the eight maple blocks to both ends of the top.

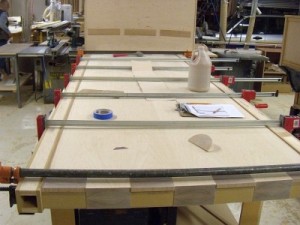
With the maple blocks applied, we flush trimmed the outside edges and sanded the sides of the table smooth with a random-orbit sander. We then glued on the strips of veneer that would trim the front and back of the desk. In order to ensure the veneer had adequate pressure along its entire length, we constructed tubular torsion boxes, specifically for this piece, to act as a platen between the clamps and the veneer. In the past, we have used a single layer of melamine as the platen, but found out the hard way that it is not stiff enough to prevent bubbles or wrinkles from forming in the veneer.

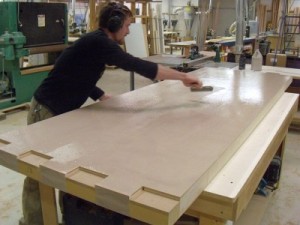
The next day, we removed the platens, trimmed off the excess veneer from the front and back, and trimmed off the last remaining overhanging side of the maple blocks. We then glued the four small squares of maple veneer onto each end. With the veneer and end block work completed, we spent an hour or so rough sanding and final sanding every surface, until everything was flat and smooth.
In the next installment we will build the legs, assemble the table, add the drawers, and send it through the finishing room.


Have something to say? Share your thoughts with us in the comments below.