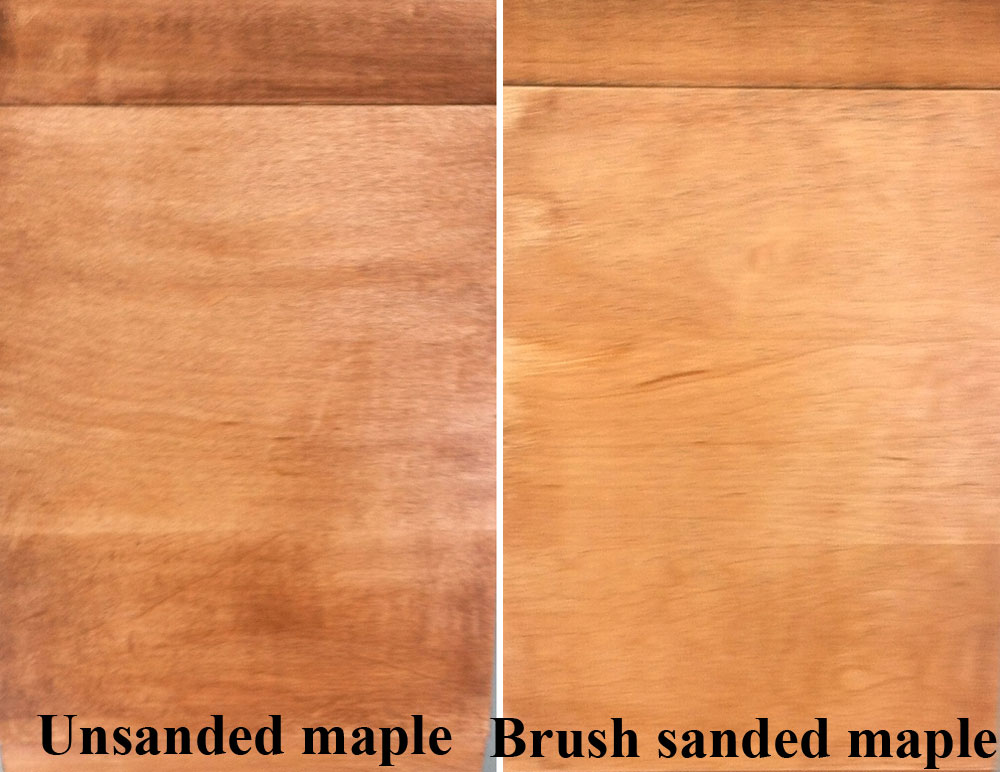
 Final whitewood sanding is the most important step in finishing for satisfactory results. Poor finish quality, rework, and missed expectations are in most cases a direct result of improper final whitewood sanding preparation.
There are three commonly used methods to prepare the surface of the wood as a final step before finishing: widebelt sanding, random orbit sanding and brush sanding.
Widebelt sanding to 220-240 grit sandpaper works well for flat panel work and where a linear scratch pattern with the grain of the wood is acceptable. Random orbit sanding is used as a final step to remove minor defects and provides a scratch pattern that is invisible after finish is applied. However, this method cannot sand in profiled areas and can be inconsistent when using manual hand orbiter sanders. Brush sanders use strips of abrasive and are backed by different types of brush media to force the abrasive strips into corners and recessed profiles of the substrate.
Of these three technologies, brush sanding has become one of the most viable technologies to become lean and improve profitability in finishing. While many companies still do a considerable amount of orbital and hand sanding, brush sanding, when set up properly, can eliminate most hand sanding labor. New brush sanding technologies can provide the following process benefits:
• Consistent breaking of sharp edges to eliminate sealer sand-through
• Consistent stain color and elimination of most blotchiness
• Consistency of finish color in day to day production
• Elimination of most fiber raise, a very important consideration with water base finishing
• Removal of drag marks and minor defects
• Opens the pores of the wood uniformly for even finish absorption
• May reduce volume of coatings consumed
From a lean perspective, brush sanders will reduce rework, lower sanding preparation labor, and lower material costs. In addition, correct brush sanding technology will return profitability on investment quicker than most any other investment in finishing. Most wood manufacturing shops with $7 million to $10 million in sales and up should see a return on the investment in less than one year, but not more than three years from purchase.
The benefits of finish quality cannot be overstated when using the right brush sanding procedure. The uniformity of stain colors, depth of finish, and the clarity of the finish will dramatically improve the visual perception of the product. Removing the human error factor from hand sanding operations also provides confidence in the consistent outcome of the final finish quality. In some situations, a color step may be eliminated to reduce the amount of the cost in the finish while still providing a high-end look.
 Benefits of Brush Sanding
Brush sanding will remove the following defects: knife marks above 14 per inch; dried marks and surface defects; excessive fiber raise; and blending of cross scratch and swirl marks.
However, brush sanding cannot remove the following defects: large indentations and defects; glue; chatter marks; and heavy cross scratch on uneven joints.
Selecting the Correct Technology
The best results with brush sanding are achieved when the abrasives have a long contact or dwell time on the part. The longer the dwell time on the part, the slower the brush sanding rpm device can be set to operate. Slower abrasive RPMs allow the abrasive media to sand better down into the complex profiles. Slow sanding speed RPMs also allow the sandpaper to remove the wood fiber, whereas a high speed may pull up wood fibers without sheering and removing the fibers from the substrate.
Long abrasive strips will do a much more effective sanding job than short abrasives. Longer abrasive media will allow the strips to bend and sand along the surface of the strip rather than on the tip of the abrasive strip.
Narrow abrasive strips work best for non-aggressive sealer sanding. Wide abrasive strips provide a more aggressive sanding action to remove deep defects.
It is important to insure that all abrasives be broken in before placing them into production. This will ensure an invisible scratch pattern and provide a scratch profile that will allow the stain to develop to the correct color. It is also critical that an abrasive change-out procedure is followed to ensure a consistent finish. Consult with your abrasive supplier for recommendations on a correct change-out procedure for your process.
Proper sanding preparation before finishing is the true secret for success for profitability and finish quality.
Phil Stevenson is the president and owner of AWFI, a provider of coating application training, consulting, and process engineering. For information visit AWFI.org.
Click here for some Frequently Asked Questions on finishing & sanding
Read what woodworkers want in sanding and finishing materials and equipment


Have something to say? Share your thoughts with us in the comments below.