Lately I have had a run on countertop orders. They have all been walnut (which is the hottest wood around right now), and all 1-1/2″ thick. These jobs could be as simple as gluing up boards 1-1/2″ thick and going home, but I don’t make anything simple.
First, a little background. In case you haven’t read much of my blog, I cut and use as much of my own lumber as I can. I get all of my logs for free and have little jurisdiction over what I get. When I mill the logs I rarely have a specific job in mind. I am cutting lumber and guessing what will sell. I tend to cut 4/4 lumber because it is the quickest to dry and the easiest to sell. It makes up about 75% of my sales, and is my fallback position.
I only cut thicker lumber when I have a really good log that will produce high-quality thick boards or I have to order for it, and then only when I am not in a hurry (thicker lumber takes longer to dry). So, that leaves me with a lot 4/4 lumber that needs to magically grow to 1-1/2″ thick when a countertop comes along. Martin Goebel (a friend and fellow woodworker) would call me an idiot and tell me to cut all of my wood thick, that there is no substitute and anything else I do is just nonsense. I am OK with that, but that isn’t the real world.
In the real world, regular woodworkers (and even irregular ones) are often asked to make some magic happen from time to time. Often, it involves stretching lumber to make a project even possible. And, so it was on my latest countertop, when I was asked by a customer to make a large island top out of their small walnut tree.
In this case, I didn’t have enough lumber available in the logs to cut them thick and still get the coverage I needed. I also needed to get the top installed in just a couple of months and thicker lumber would have made that nearly impossible (without my dream vacuum kiln).
I pulled out a trick that I “invented” years ago when I had a similar situation with lumber that was too thin for the job. In that first attempt, I reassured myself that I could do it because the room it was going in had little light and no one could look at it closely anyway. It so happens that it turned out great and now it is my go-to move (much to Martin’s chagrin).
The concept is simple, but until you see a finished piece you may be as skeptical as I was on my first one. Keep an open mind and be sure to look at the final pictures of the accompanying slide show, and I think you will be a believer.
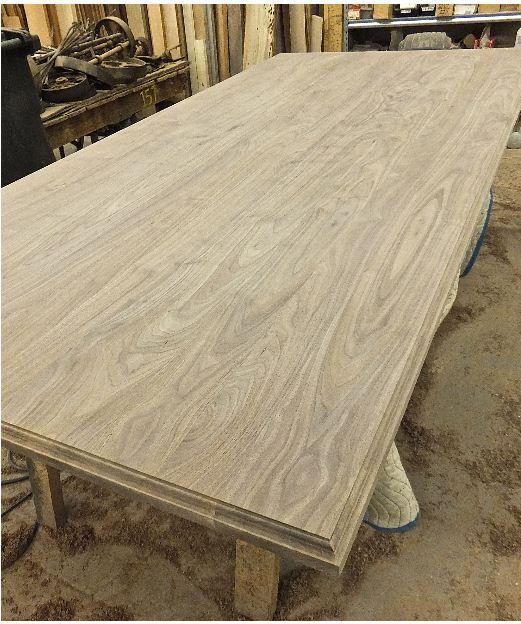
How to Do It
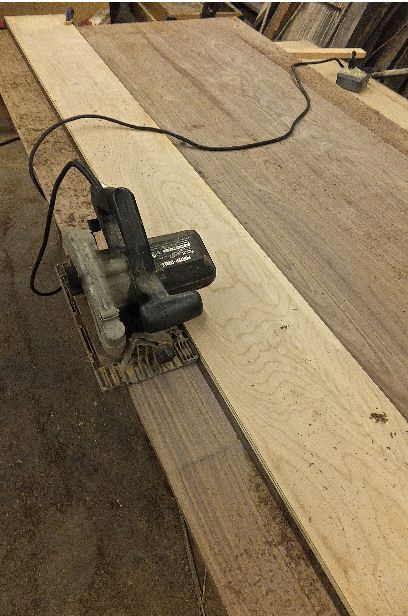
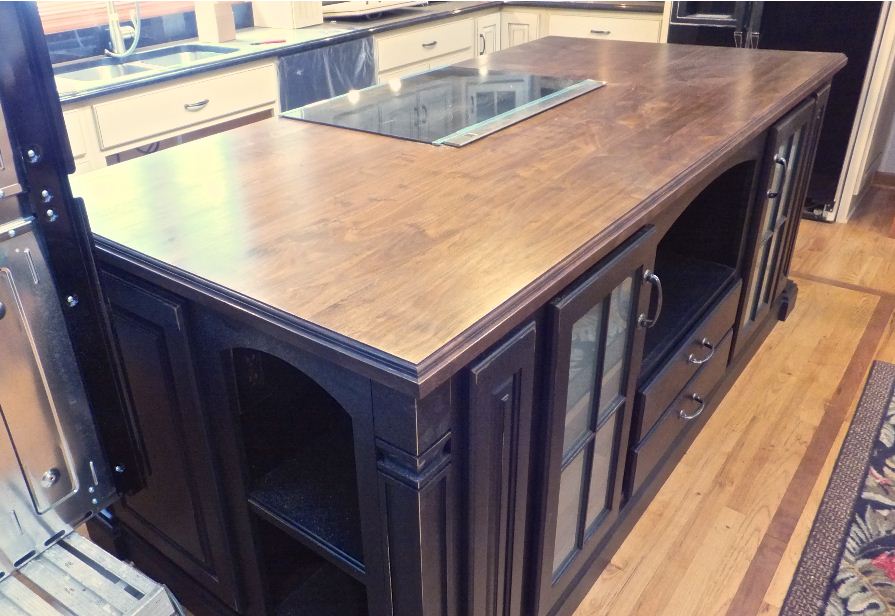
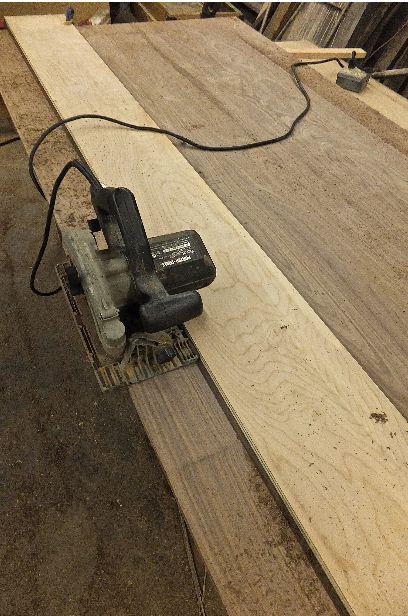
It all starts with picking out the lumber and laying out the boards to be about 1-1/2″ to 2″ wider than the finished piece on all four sides. For the countertop in the photos, the finished size was 42″ x 96″, so my final glue-up was about 46″ x 100″. After the top is glued up and sanded, it is time to lay it out and trim it to the final size. (Slide 1)
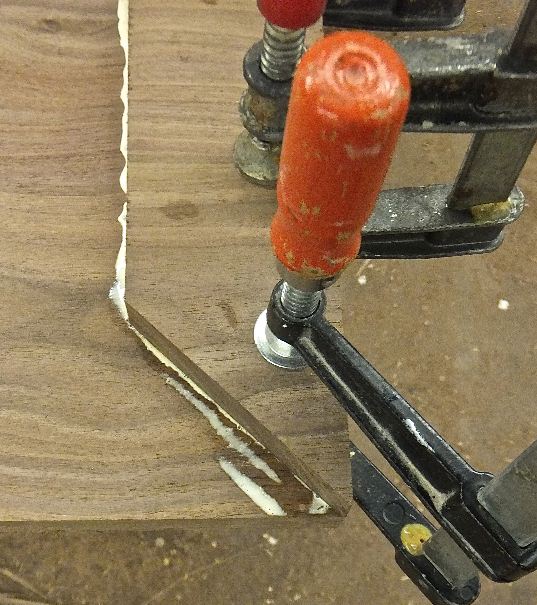
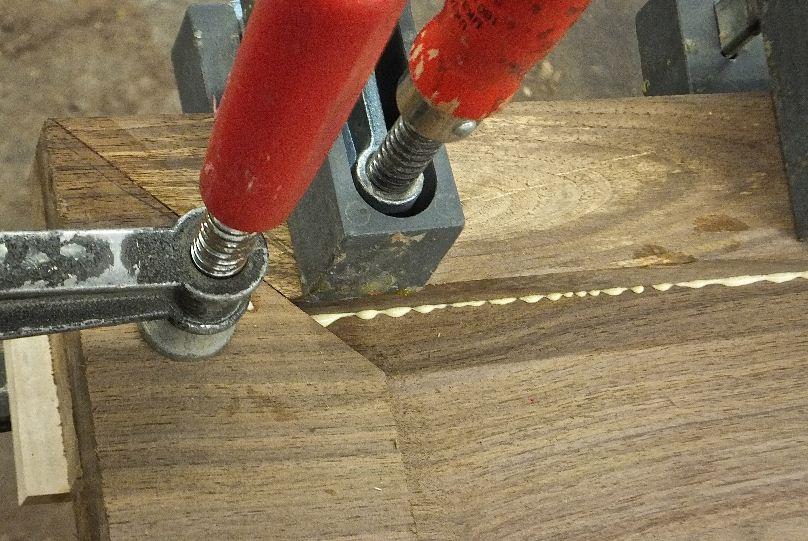
As you trim the top, keep track of the offcuts and their relationship to the countertop. All of these pieces have to be flipped under the top to make up the extra thickness, and they need to line up with their original position. Start with the end grain pieces because they are the most critical as far as alignment goes. Miter the corners, flip them over and glue them on. (Slide 2 & 3)
After gluing the end-grain pieces, do the same thing with the long-grain pieces. The grain alignment is less critical on these pieces, so focus more on the fit of the miters and making sure that the corners look good. (Slide 4)
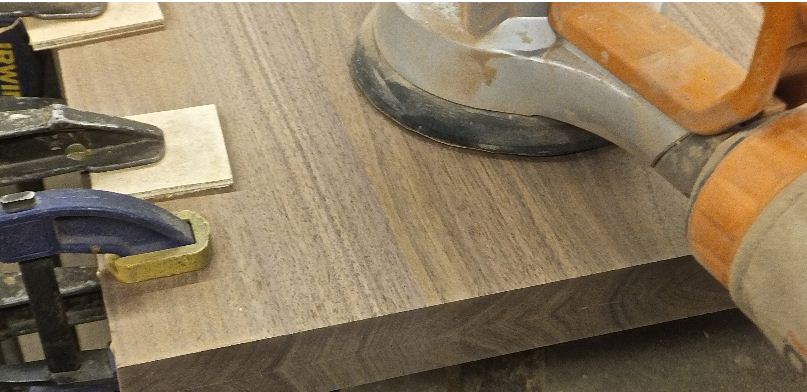
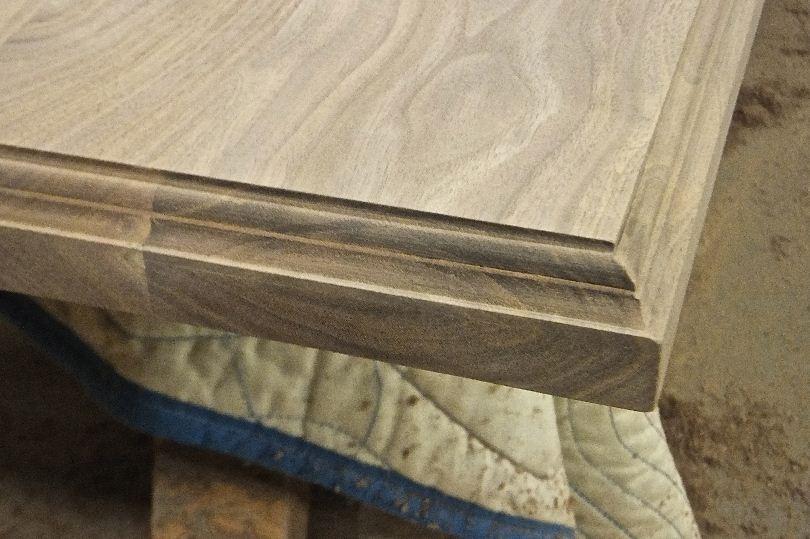
After the glue is dry on all of the edges, it is time for more sanding. I use a 6″ random orbit sander for this task. Spend enough time sanding to make sure all of the saw marks are gone on the edge. If you are doing a top with a square edge, it is time to do the final overall sanding and finishing. (Slide 5)
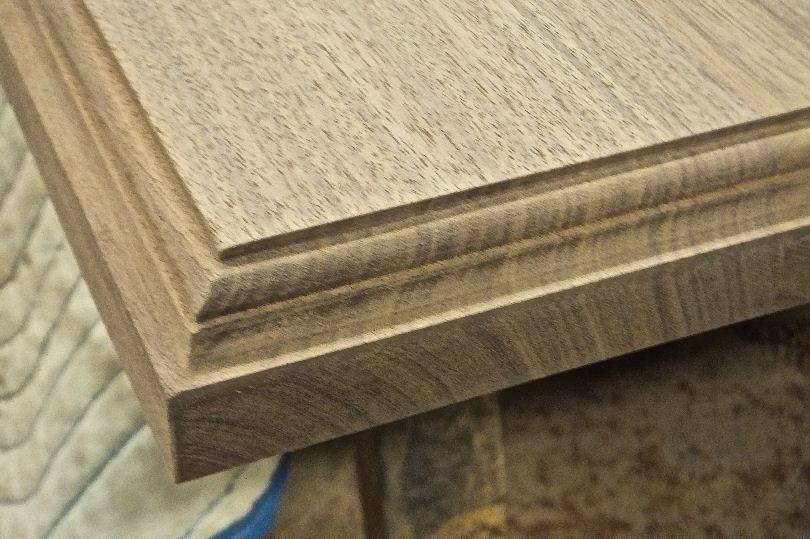
The top I did got a profiled edge, which helped hide the glue lines even more. Look at the photos below to see how the endgrain on flatsawn and quartersawn lumber looks. (Slides 6 & 7)
After profiling the edge, just a little more sanding finishes up the woodworking portion of this top. Next, it is on to the finish. (Slide 8)
When finishing walnut, I usually put on a coat of walnut stain (yes, walnut stain on walnut). It is a 50/50 blend of Minwax Special Walnut and Minwax Dark Walnut to maintain the dark color, since walnut lightens with age. The stain does a great job of enhancing the rich color without hiding the grain. Waterlox, which is easy to apply and repair, was used as the topcoat.
After all is said and done, I think you’ll agree that the top looks great, and appears to be made from thicker lumber. I even ended up with a few extra boards. (Slide 9)


Have something to say? Share your thoughts with us in the comments below.