We had a client from Memphis, TN, contact us about designing and building a maple table. The client saw the original table in an Apple store, being used as a display table, but he wanted to use the same design and turn it into a desk.
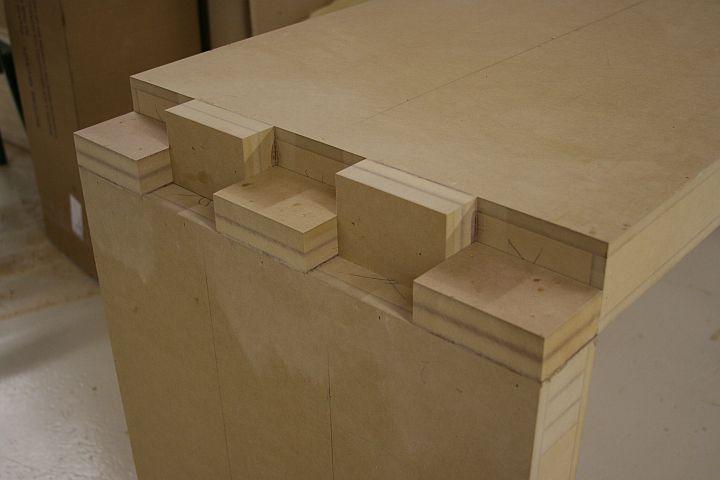
The desk is downright massive! It measures 78″ wide, 29.5″ high, 22″ in deep, and the legs and the top are 3″ thick. The design centerpiece of this desk is the huge box joints where the leg connects to the top. The end grain of the maple is much darker than the face grain, which really makes this construction method pop!
These design elements required us to take a couple of issues into consideration. First off was the thickness of each piece. Whenever you are looking at gluing a large amount of wood together at 3″ in thickness you need to stop and analyze the volatility of that will in the future. If we were building this table for a client right here in Boise, ID, out of a material like quarter-sawn African mahogany, we might just think about using solid wood throughout. But, since this table is being constructed from Hard maple, which is a wood species that is fairly volatile and susceptible to moisture changes in the environment, and since, like we stated earlier, this table is being shipped to a client in Memphis, we decided the best method for construction would be to use a maple veneer on all the surfaces.
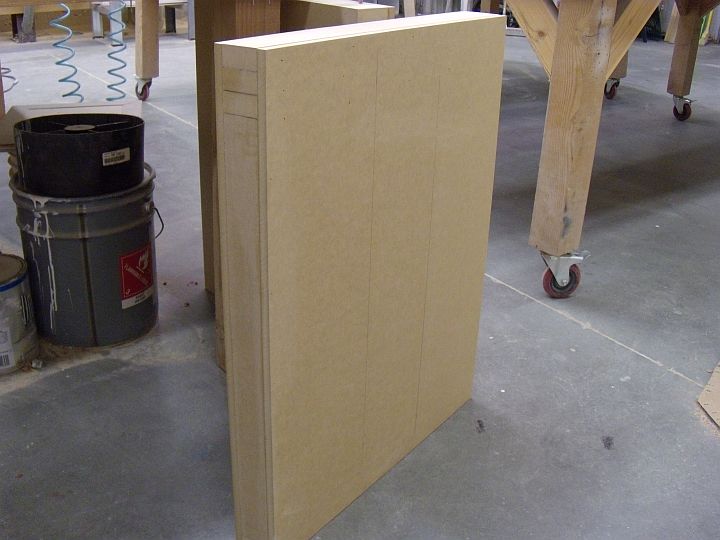
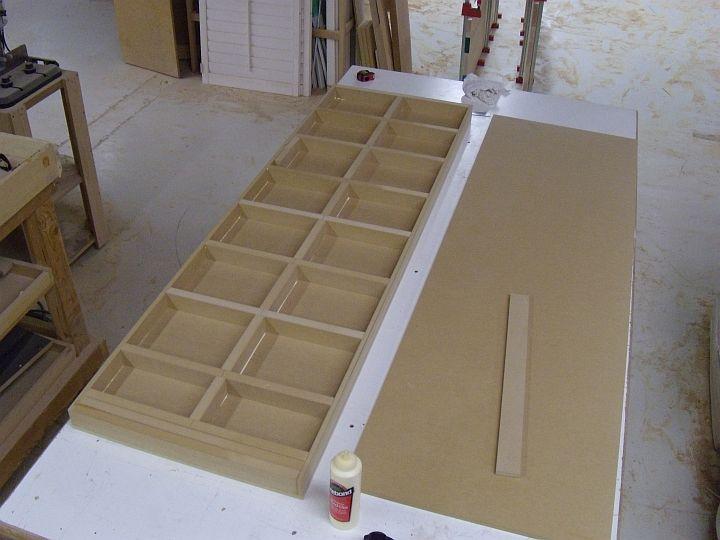
The first step we tackled was to build the three torsion boxes that would make up the two legs and the desk top. A torsion box is simply a hollow box with an interior cellular layout that once glued and nailed, is incredibly strong and lightweight. We used .5″ MDF for the skins and .75″ MDF for all of the interior framework.
When the torsion box is all complete, this is what it looks like. A simple box that has absolutely no give or flex. This construction technique is perfect for anything that needs to be big, thick, flat, and solid. Many assembly tables are constructed this way, because they will stay flat and true, even under large amounts of stress and weight.
The next step, after the edges of the boxes were cleaned up using the table saw and a hand sander, was to begin laying out the five fingers of the box joint.
We had two issues to deal with at this point. The first one, the creation of a perfectly fitted box joint and the second one, the creation of end grain on the ends of each of those fingers.
Usually box joints are created on a table saw using a dado blade and a jig, but when you have a box joint that is 4.4″ wide and 3″ deep, you have to begin looking to more creative ways to create the joint. Our decision was to make the box joints independent of the table top and legs, rather than trying to make them an integrated part of the table top and legs.
We accomplished this by dividing the 3″ deep finger joint in half and constructing the bottom half from MDF and the top half from hard maple end grain.
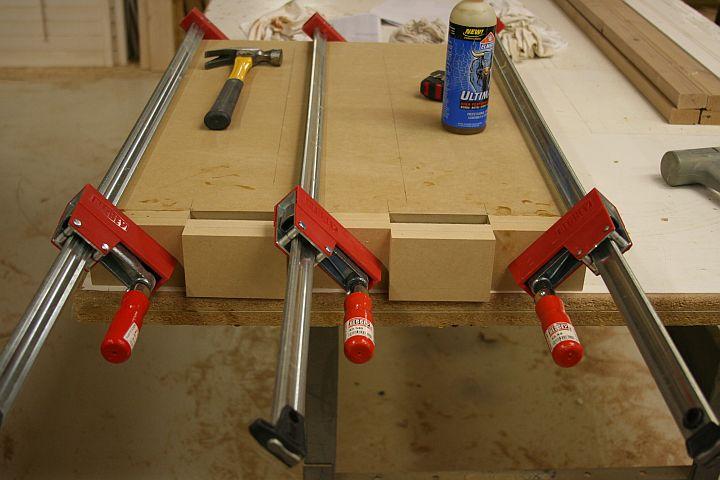
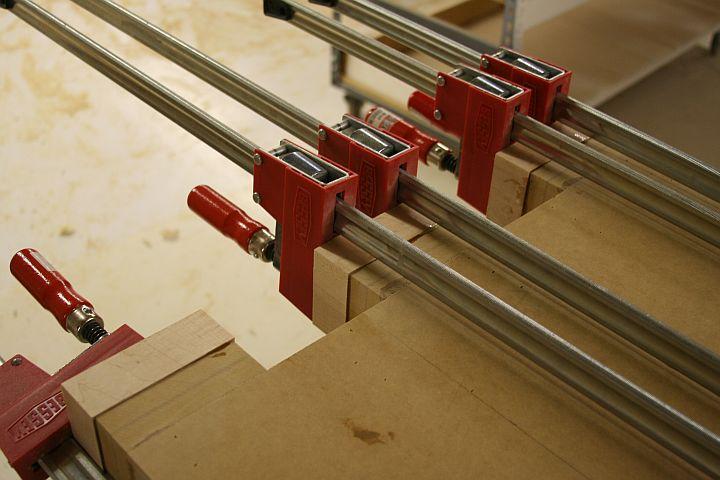
We began by gluing two 0.75″ pieces of MDF together and, once the glue had dried overnight, cut five equal width pieces that spanned the entire width of the side of the torsion box. We then clamped the outside and middle blocks to the end of the top with polyurethane glue, while using the two blocks that would be glued to the legs as a perfectly sized spacer between.
When the glue had dried, and the excess glue was cleared away, we were left with five perfectly fitted half box joints.
It was now time to complete the rest of the box joint, which would be a 1.5″ thick piece of end grain maple glued to the half box joints we just created. We began by milling some 8/4 maple to 1.625″ thick and gluing two pieces together to form a 3.25″ thick piece. Once the glue had dried we milled the width to 4.5″, and cut ten caps from the maple stock. We then glued on the caps using liberal amounts of polyurethane glue and clamps, making sure that the maple block overhung all sides of the MDF box joint below.
Next time we will look at how we finished the box joint and veneered the torsion boxes.


Have something to say? Share your thoughts with us in the comments below.